Normal view

There are new articles available, click to refresh the page.
Before yesterdayOPEN JOURNAL SYSTEM SERVICES

OJS 3.5 LTS Is Here: You Can Now Upgrade Your Journals with Confidence

July 8th 2026 at 11:56 pm

The Public Knowledge Project (PKP) has officially released Open Journal Systems 3.5 as its LTS (Long-Term Support) version. This is the moment we’ve been preparing for. As we shared earlier, our team has been tracking every 3.5 milestone and testing theme and plugin compatibility in our own staging environments. Now we can say it clearly: it is safe to upgrade to OJS 3.5.

In this post we walk through what 3.5 brings for editors and journal managers, a few things worth knowing before you upgrade, and how we handle migrations smoothly — whether you’re coming from OJS 2, an older OJS 3.x build, or OJS 3.3.

Why it’s safe to move now

Because 3.5 now carries the LTS label, it will receive long-term bug fixes and security patches. Upgrading today puts your journal on a stable, well-supported branch for years to come — ideal for journals that prioritise reliability.

One quick note on the upgrade path: per PKP’s support policy, if you’re on a version older than 3.3, you upgrade to 3.3 first, then to 3.5. Most of our clients already run 3.3, so they can move straight to 3.5. And if you’re still on a legacy OJS 2 installation, there’s nothing to worry about — we handle the full journey, from OJS 2 to OJS 3 and all the way to 3.5.

OJS upgrade path to 3.5 LTS
Whatever version you’re on, there’s one clear, managed path to OJS 3.5 LTS.

What OJS 3.5 brings to editors and managers

What OJS 3.5 brings
Six of the headline changes editors and journal managers will notice in OJS 3.5.

A redesigned editorial dashboard. Tracking submissions is far clearer now. New filtered views help you find manuscripts at any workflow stage, while refreshed status icons and action buttons reduce the number of clicks for everyday tasks. The interface looks noticeably different from 3.3, so a short adjustment period for your team is normal.

An automatic editorial board (masthead). You no longer fill in your editorial board as free text. You assign people to the relevant role and the system compiles the masthead automatically — with optional start and end dates per member. Your board list stays accurate and consistent with almost no manual upkeep.

Invitation-based user management. To grant someone a role such as editor, editorial board member, or manager, you no longer create their account directly. You send an invitation, and the person joins by accepting it. It’s a more privacy-friendly approach that also improves data accuracy.

ORCID and ROR built in. ORCID, which previously required installing a separate plugin, now ships in the core. ROR (Research Organization Registry), which links author affiliations to standardised, global identifiers, is integrated by default too.

A “Highlights” feature on your homepage. Showcase calls for papers, eye-catching visuals, or standout articles right on your homepage, with an optional rotating carousel. (Availability may vary by theme.)

Author-suggested reviewers. Authors can propose a reviewer’s name, affiliation, or email during submission, and that suggestion is passed to the editor.

Beyond these, 3.5 adds multiple author affiliations, basic JATS XML support, the ability to set a minimum number of reviewers per submission, and improved multilingual handling.

What to know before you upgrade

Let’s be candid: 3.5 isn’t a cosmetic refresh — it’s a structural release. That’s exactly why it’s worth planning the move properly.

  • Some workflow habits change. The automatic editorial board and the shift to invitation-based user management will change a few steps your team is used to. A brief walkthrough after the upgrade is usually all it takes.
  • Email configuration matters. Invitations and notifications are delivered by email, so your server’s email setup needs to be working reliably. We always verify this as part of the upgrade.
  • Custom themes and some plugins may need updating. The infrastructure changes in 3.5 can require adapting custom themes and certain plugins, and your server environment needs to be current (a modern PHP version). We test all of this beforehand and make the necessary adjustments.
  • Staging first, then live. We always run the upgrade on a copy (staging) environment first, confirm everything works, and only then move it to production. Full backups and data integrity are our standard, non-negotiable.

Whatever version you’re on, we manage the upgrade

  • Full OJS 2 to OJS 3 migration
  • Upgrades from OJS 3.1 / 3.2 / 3.3 to OJS 3.5
  • Theme and plugin compatibility, data integrity, and zero-loss transitions
  • Complete pre-upgrade backups and staging verification

Ready to upgrade? Get in touch

If you’d like to move to OJS 3.5, want advice on the best path for your current version, or have any other questions, reach out to us. Let’s plan the smoothest possible transition together — preserving your data, your theme, and your workflow.

Contact us →

The post OJS 3.5 LTS Is Here: You Can Now Upgrade Your Journals with Confidence first appeared on OPEN JOURNAL SYSTEM SERVICES.

Article Numbers for OJS

July 8th 2026 at 12:49 am

Scholarly publishing is quietly leaving the page behind.

For centuries an article’s address was its page range: pp. 245–260. That made sense when a journal was a physical object — paper had to be bound, and binding meant every article started somewhere and ended somewhere. But the page range was never really about the article. It was about the paper.

The paper is going away. Journals increasingly publish each article the moment it clears review — sometimes while later revisions are still in flight — rather than holding it for a quarterly issue. “Continuous publishing” is becoming the norm; the volume/issue/year container, itself a relic of print scheduling, is loosening and in some venues disappearing. Output is shifting from PDF (a print imitation) to native HTML. An article, in other words, is starting to behave much more like a web page than a page in a book.

When there is no issue to sit inside, “starts on page 245” stops meaning anything. What identifies the article instead is an article number (also called an elocation-id): PLoS ONE 15(4): e0231470, Electron. J. Combin. 27 (2020) P2.16, J. Vac. Sci. Technol. … 051101. The death of the page number isn’t a fashion. It’s the unavoidable consequence of the medium changing (paper to screen) and the rhythm changing (batched issues to continuous flow).

That is the gap this plugin was built for.

The problem in OJS today

Open Journal Systems has no dedicated field for an article number. So editors do the only thing they can: they type it into the Pages field. That single workaround quietly corrupts metadata everywhere downstream.

  • Google Scholar reads the value as both citation_firstpage and

citation_lastpage — a fake one-page range, and a broken bibliographic record.

  • Crossref expects the value in a dedicated <item_number>, not in

<pages>; a page-field value is deposited in the wrong place.

  • PMC / PubMed require either a first page or an <elocation-id>; a number

buried in page text can’t produce a valid one, and the deposit risks rejection.

  • Citation styles format article numbers specially — “Article e298”,

“Art. no. e298” — which a page-field value can never trigger.

PKP has known about this since 2019 (issue #4695). The core defined an internal property for it but left the export, citation, and editorial pieces unfinished. This plugin completes the chain — and does so in a way designed to hand back to core cleanly if core ever finishes it.

The Pages-field workaround breaks metadata everywhere
With no article-number field, editors put it in Pages — and the metadata breaks in four places at once.

What it does

A single generic plugin covers the article number end to end:

Where What happens
Editor An “Article Number” field on the publication form and in QuickSubmit. Uniqueness is enforced per journal; a published article’s number is locked so a deposited coordinate can’t change silently.
Reader The number is shown on the article page, in any theme.
Google Scholar The fake firstpage/lastpage pair is suppressed when a number is set.
Crossref <item_number item_number_type="article_number"> is injected and <pages> dropped; the output validates against Crossref’s schema.
JATS (PMC/SciELO) <fpage>/<lpage> is replaced with <elocation-id>, JATS4R-safe.
Citations Style-aware mapping across the ten bundled CSL styles — e.g. APA “Article e0001”.

The standards, mapped honestly

An article number is carried differently by every downstream system, and getting that mapping right is the work:

System Correct carrier
Crossref <publisher_item><item_number item_number_type="article_number"> — mutually exclusive with <pages>
JATS (PMC, SciELO) <elocation-id> — replaces <fpage>/<lpage>
PubMed / PMC first page or elocation-id must exist
Google Scholar (no tag) — so don’t emit a fake page range
CSL / citeproc the number variable
One article number mapped correctly to every standard
The plugin carries the same number into each system through its correct field — read-only against your data.

An engineering stance, not just a feature

We treated this as structural infrastructure, and made a few promises we don’t break:

It never touches your data. The plugin only ever writes its own value. It never writes to the Pages field or any other core field — that’s a hard architectural guarantee, independently verified, not a convention.

It never forks anything. Crossref, JATS, Scholar and citation output are amended by attaching to existing extension points — no export plugin, and no CSL style file, is ever copied or edited.

It’s opt-in, per journal. Off by default. When off, OJS behaves exactly as before.

It’s built to hand off to core. The value is stored under PKP’s own internal property name, workNumber. If a future OJS core ships the field natively, the plugin detects it, steps aside, and your data is already in the right place under the right name — a zero-migration hand-off. The plugin is designed to be always usable, or cleanly transferable. Either way, the journal’s data is safe.

Honest about the edges

Good tools are honest about what they don’t do. Two limits are worth stating plainly, because both come from the ecosystem, not from cutting corners.

Citation styles. Of the ten bundled styles, seven render the article number cleanly (ACM, ACS, APA, Chicago, Turabian, Vancouver — and MLA, after we fixed a double-printing bug). Three — ABNT, Harvard and IEEE — never expose the CSL number variable for journal articles and force a “p.” (page) label onto the value. The number is present and correct in those styles, but shown with a page label. Removing that would mean forking the bundled CSL files, which we don’t do.

RIS / BibTeX downloads. The article number is present and correct in both, but in a page field (RIS SP, BibTeX pages) rather than a canonical machine-readable one. Writing it to BibTeX’s eid would require forking a CSL file. For RIS we actually found a fork-free way to write the C7 (“article number”) tag — and chose not to ship it, because C7‘s round-trip isn’t guaranteed across reference managers, and an uncertain gain wasn’t worth a permanent maintenance burden. The canonical, standards-compliant path is already covered where it matters most: Crossref and JATS.

We’d rather tell you exactly where the line is than pretend there isn’t one.

Independently reviewed

Before release the plugin went through a full pre-release security and compatibility review: no Critical or High findings, clean on PHP 7.4 and 8.1, zero core-file changes, no export-plugin forks. The full test matrix ships with the plugin.

Moving your existing archive — safely

If your journal has been storing article numbers in the Pages field for years, there’s a migration tool — available both from the plugin’s settings panel (for one journal) and as a command-line tool (for large archives or every journal at once).

It’s a derivation, not a move. The tool reads the Pages value and copies it into the Article Number field; it never modifies Pages, in any mode. Genuine page ranges like 245–260 are never treated as candidates, ambiguous values are flagged for review, and an “undo” removes only what the tool itself created. Your source data is never at risk.

See it live

The same plugin, two very different themes — proof that display is theme-independent:

  • OJS default theme: [an issue where every article is identified by an

article number](https://ojs-services.com/ojsdemo/index.php/pub/issue/view/24) · example article

  • Atlas premium theme: [the same, in a premium

layout](https://themes.ojs-services.com/index.php/atlas/issue/view/83) · example article

Open the “How to Cite” box on any of them: the citation reads Article e0001, not a page range — and the article’s Crossref and JATS metadata carry it in the correct field.

Availability

The plugin is free and open source (GPL v3), targeting OJS 3.3 (PHP 7.4–8.1), with ports to 3.4 and 3.5 planned. It’s on GitHub at github.com/ojs-services/articleNumber.

↗ View the plugin on GitHub — github.com/ojs-services/articleNumber

If you’d like help deploying it — or migrating an existing archive of page-field article numbers — that’s what we do: OJS-Services.com.

Page numbers described where an article sat in a stack of paper. As that stack disappears, journals need a way to identify an article on its own terms. This plugin is a small, careful piece of that infrastructure — built read-only against core, mapped to the standards, honest about its edges, and ready to hand back to OJS core the day core is ready for it.

We didn’t want to follow where publishing is going. We wanted to build for it.

The post Article Numbers for OJS first appeared on OPEN JOURNAL SYSTEM SERVICES.

Sections vs. Categories in OJS: What’s the Difference, and Why Can’t I Delete My Section?

July 6th 2026 at 7:04 am

Two OJS features that look almost identical — but structure your journal in completely different ways. Here’s what Sections and Categories each really do, and why a section sometimes refuses to be deleted.

If you manage a journal in Open Journal Systems (OJS), sooner or later you run into two features that look like they do the same thing — Sections and Categories — and a frustrating moment where OJS refuses to delete a section, insisting “someone is still using it,” even though you’re sure no article does.

Both problems come from the same misunderstanding. Once you understand what each feature actually is, everything falls into place: your Table of Contents gets cleaner, your indexing gets more reliable, and readers get a genuinely useful way to browse your journal.

This guide clears it up with plain language and five real-world examples.

OJS Section vs Category: article type versus subject
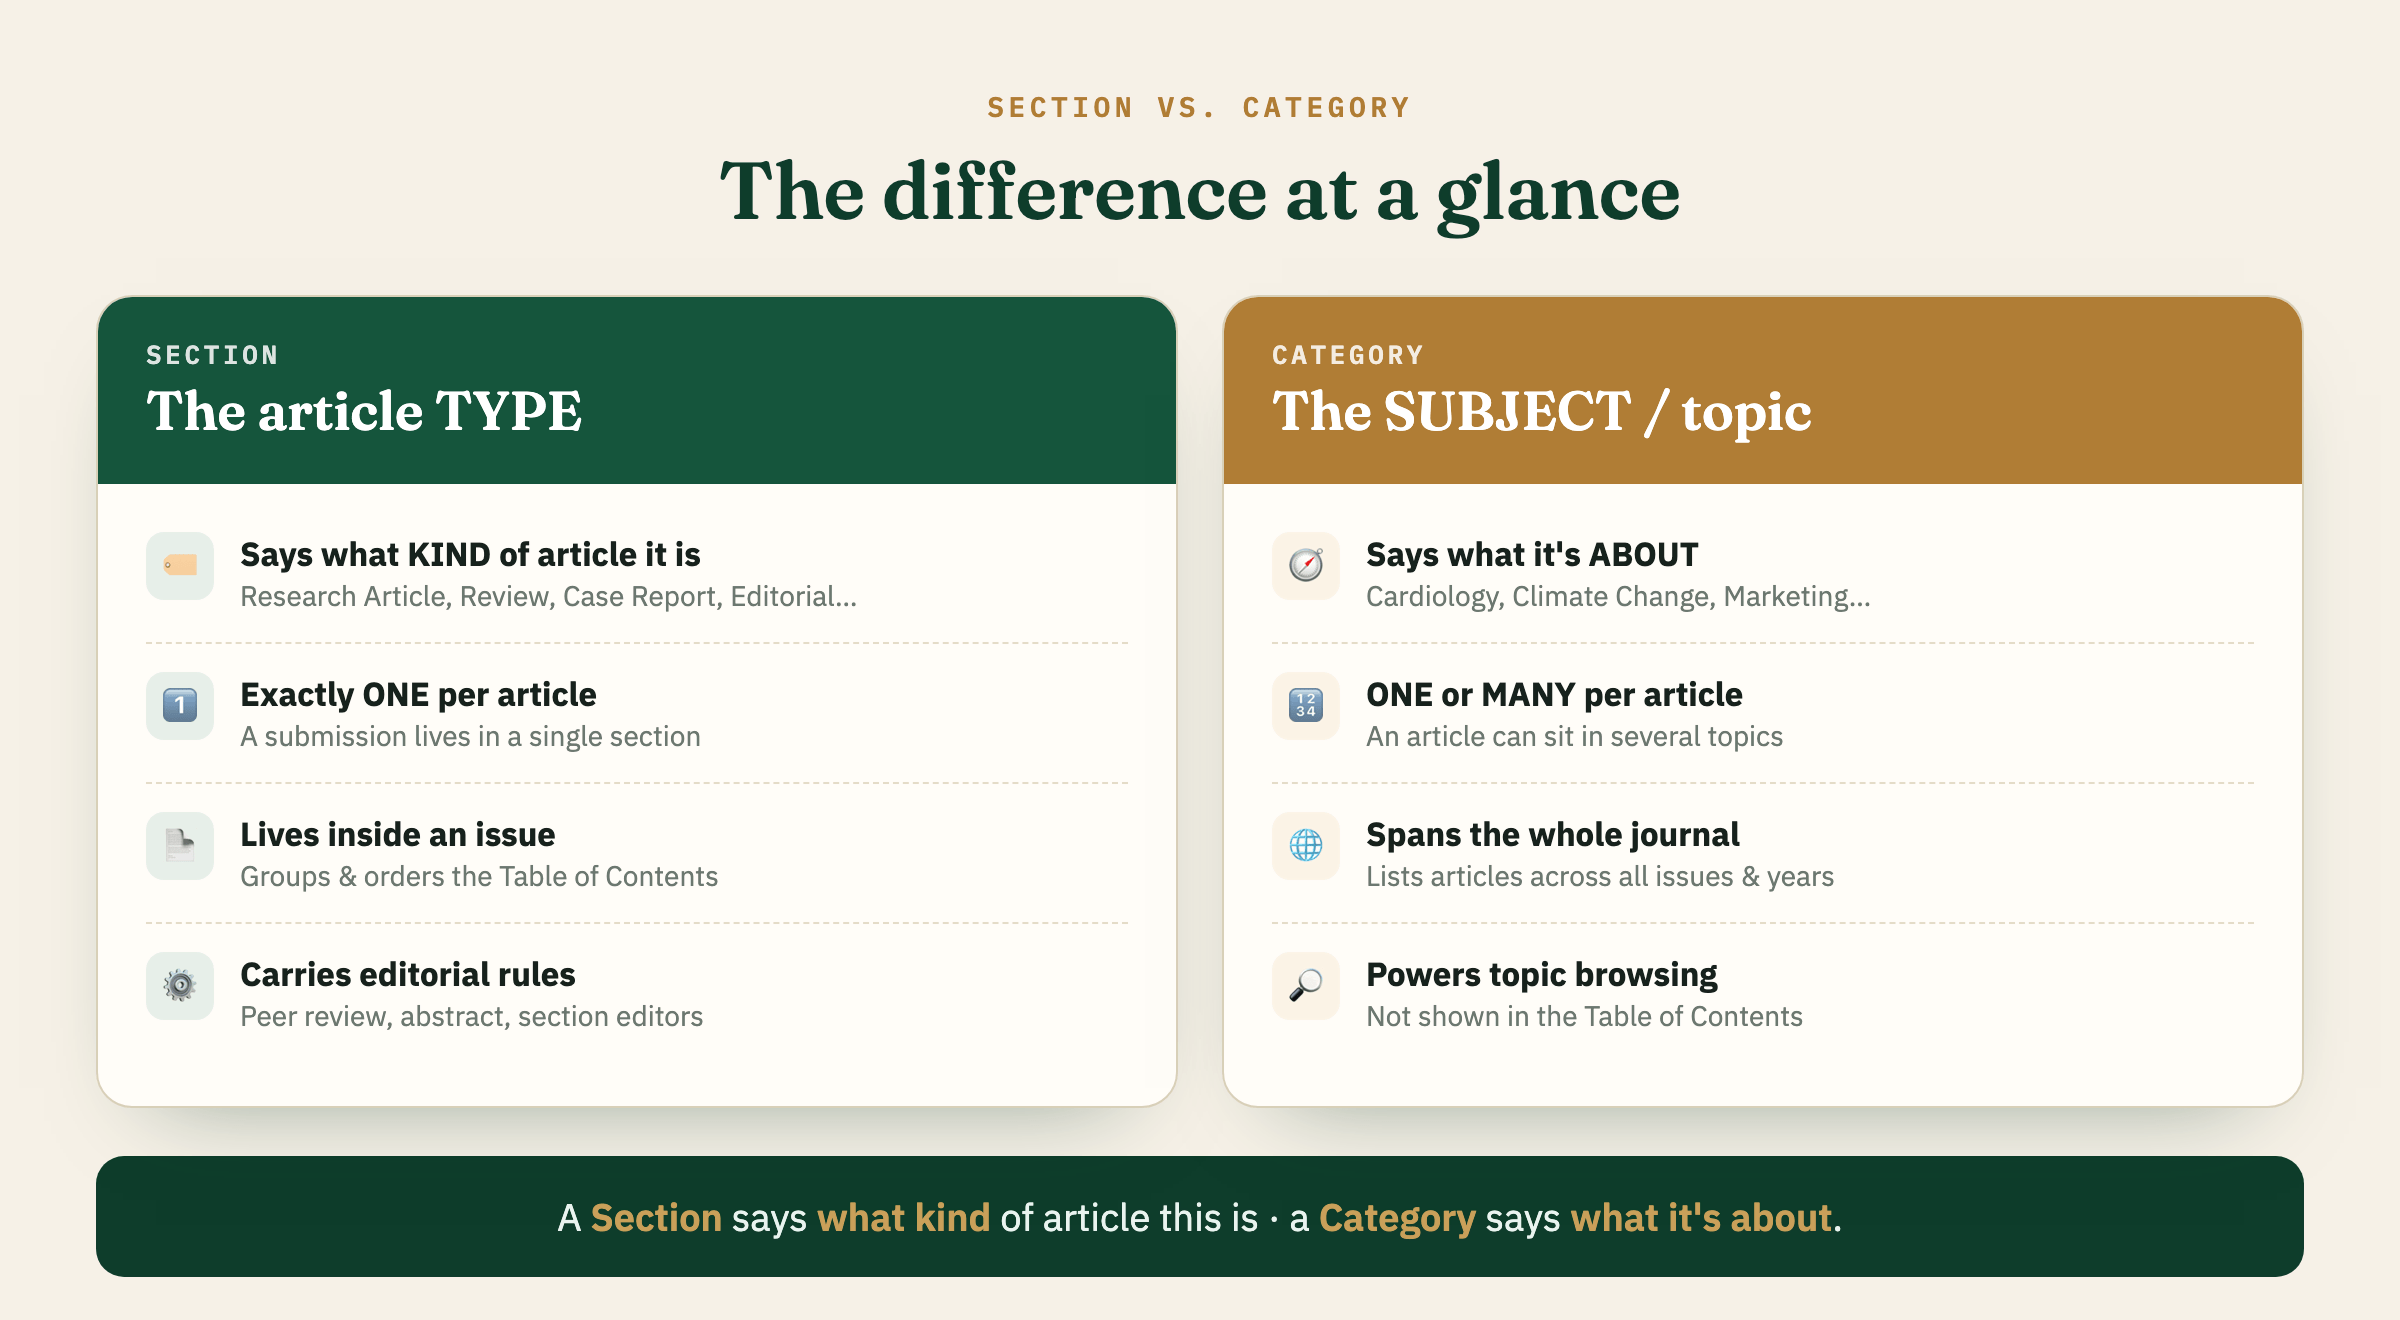
Section vs. Category at a glance — a Section is the article type; a Category is the subject.

The short answer

Section Category
What it represents The article type The subject / topic
Typical values Research Article, Review, Case Report, Editorial Cardiology, Climate Change, Marketing… (journal-specific)
How many per article? Exactly one One or many
Scope Lives inside a single issue Spans the whole journal, across all issues
Shows up in the Table of Contents? Yes — it groups the ToC No
Shows up in the article PDF? Usually yes (as the type header) Usually no
Can direct submissions to a section editor? Yes No
Hierarchy (parent/child)? No Yes (nested)
Main job Structure the issue & the record Let readers browse by topic

If you remember only one line: **a Section says what kind of article this is; a Category says what it’s about.**

What a Section really is

A Section is the structural building block of an issue. When you open any issue’s Table of Contents, the headings you see — “Research Articles,” “Reviews,” “Editorial” — are sections.

Key properties:

  • One section per submission. During submission, an article is placed in a single section. It cannot live in two sections at once.
  • It structures the Table of Contents. Sections group and order the articles within an issue.
  • It carries editorial rules. A section defines whether items are peer-reviewed, whether an abstract is required, word limits, section policy, and which section editors handle it.
  • It travels with the record. The section is part of your issue structure and is carried through your journal’s OAI-PMH feeds and native XML exports, which is how harvesters and indexes read your content’s structure.

Technically, a section is simply the single main editorial division a submission is attached to — OJS itself doesn’t force it to mean “type,” and some journals legitimately use sections for a discipline, a standing theme, or a special collection. But because a section maps so naturally onto article type, that’s how the overwhelming majority of well-run journals use it:

Research Article · Review Article · Case Report · Short Communication · Editorial · Letter to the Editor · Book Review

A note worth making: some journals create a single generic section called simply “Articles” and drop everything into it. OJS will let you do this, but it’s not ideal — indexers and readers still want to know the article type. If you go this route, make sure the article type is clearly stated inside the PDF (e.g., a “Research Article” label on the first page). Article type is one of the things indexes and reviewers check most often, so it should be clearly stated somewhere the reader can see it — even if the exact requirement varies from one standard to the next.

And this isn’t only house style. Publishing standards such as JATS XML (used by PubMed Central and many indexing services) formally enumerate article types — research-article, review-article, case-report, editorial, letter, and so on — through a dedicated article-type attribute. Keeping your sections aligned with these recognized types makes your exported metadata cleaner and more machine-readable downstream.

(For a deeper look at article types, see our companion guide: Types of Articles in Academic Publishing — A Comprehensive Guide.)

What a Category really is

A Category is a completely different animal. It is not a property of the article in the bibliographic sense — it’s a browsing and listing tool for readers.

Key properties:

  • A subject/topic layer. Categories organize your articles into thematic collections (“Cardiology,” “Public Health,” “Renewable Energy”).
  • Multiple categories per article. A single article about, say, air pollution and childhood asthma can sit in both “Environmental Health” and “Pediatrics” at the same time.
  • Journal-wide, not issue-bound. When a reader clicks a category, OJS lists every article in that topic — no matter which issue or year it was published in.
  • It has its own page and a browse block. Each category gets a dedicated page listing its articles; you can also enable a “Browse by Category” block in the sidebar so readers can explore topics directly.
  • It appears on the article landing page, linking readers to related articles — but it does not appear in the issue’s Table of Contents, and it normally does not appear in the PDF.
  • It can be nested. Categories support one level of parent/child hierarchy (e.g., “Clinical Medicine” → “Cardiology”), which sections cannot do.

In other words: sections describe this article, in this issue; categories describe a theme, across the entire journal.

Why OJS won’t let you delete a section

Here’s the scenario that starts most of these conversations:

“I want to delete a section, but OJS says someone is using it. But not all my articles use it — so why won’t it let me?”

The rule is stricter than people expect: **OJS blocks deletion if even one submission is still assigned to the section. “Most articles don’t use it” isn’t enough — you need zero** submissions attached.

And the culprit is usually a submission you weren’t thinking about:

  • an old article sitting in a back issue,
  • a declined or archived submission (these still count),
  • or an incomplete draft parked in the submission queue.

Do not force the deletion. If a section is removed while submissions are still attached to it, OJS can orphan those submissions — their section link becomes empty, and they can disappear from the interface entirely. That’s a data-integrity problem you don’t want.

The safe procedure:

  1. Find every submission still assigned to the section. Check all issues (including back issues), the active queue, and the Archives (declined/incomplete included).
  2. Open each one → Publication tab → reassign it to the correct section.
  3. When the count reaches zero, OJS will let you delete the section cleanly.
  4. Prefer to keep history intact? Deactivate the section instead of deleting it. It stays valid for already-published articles but stops accepting new submissions.

Five example journals: same sections, different categories

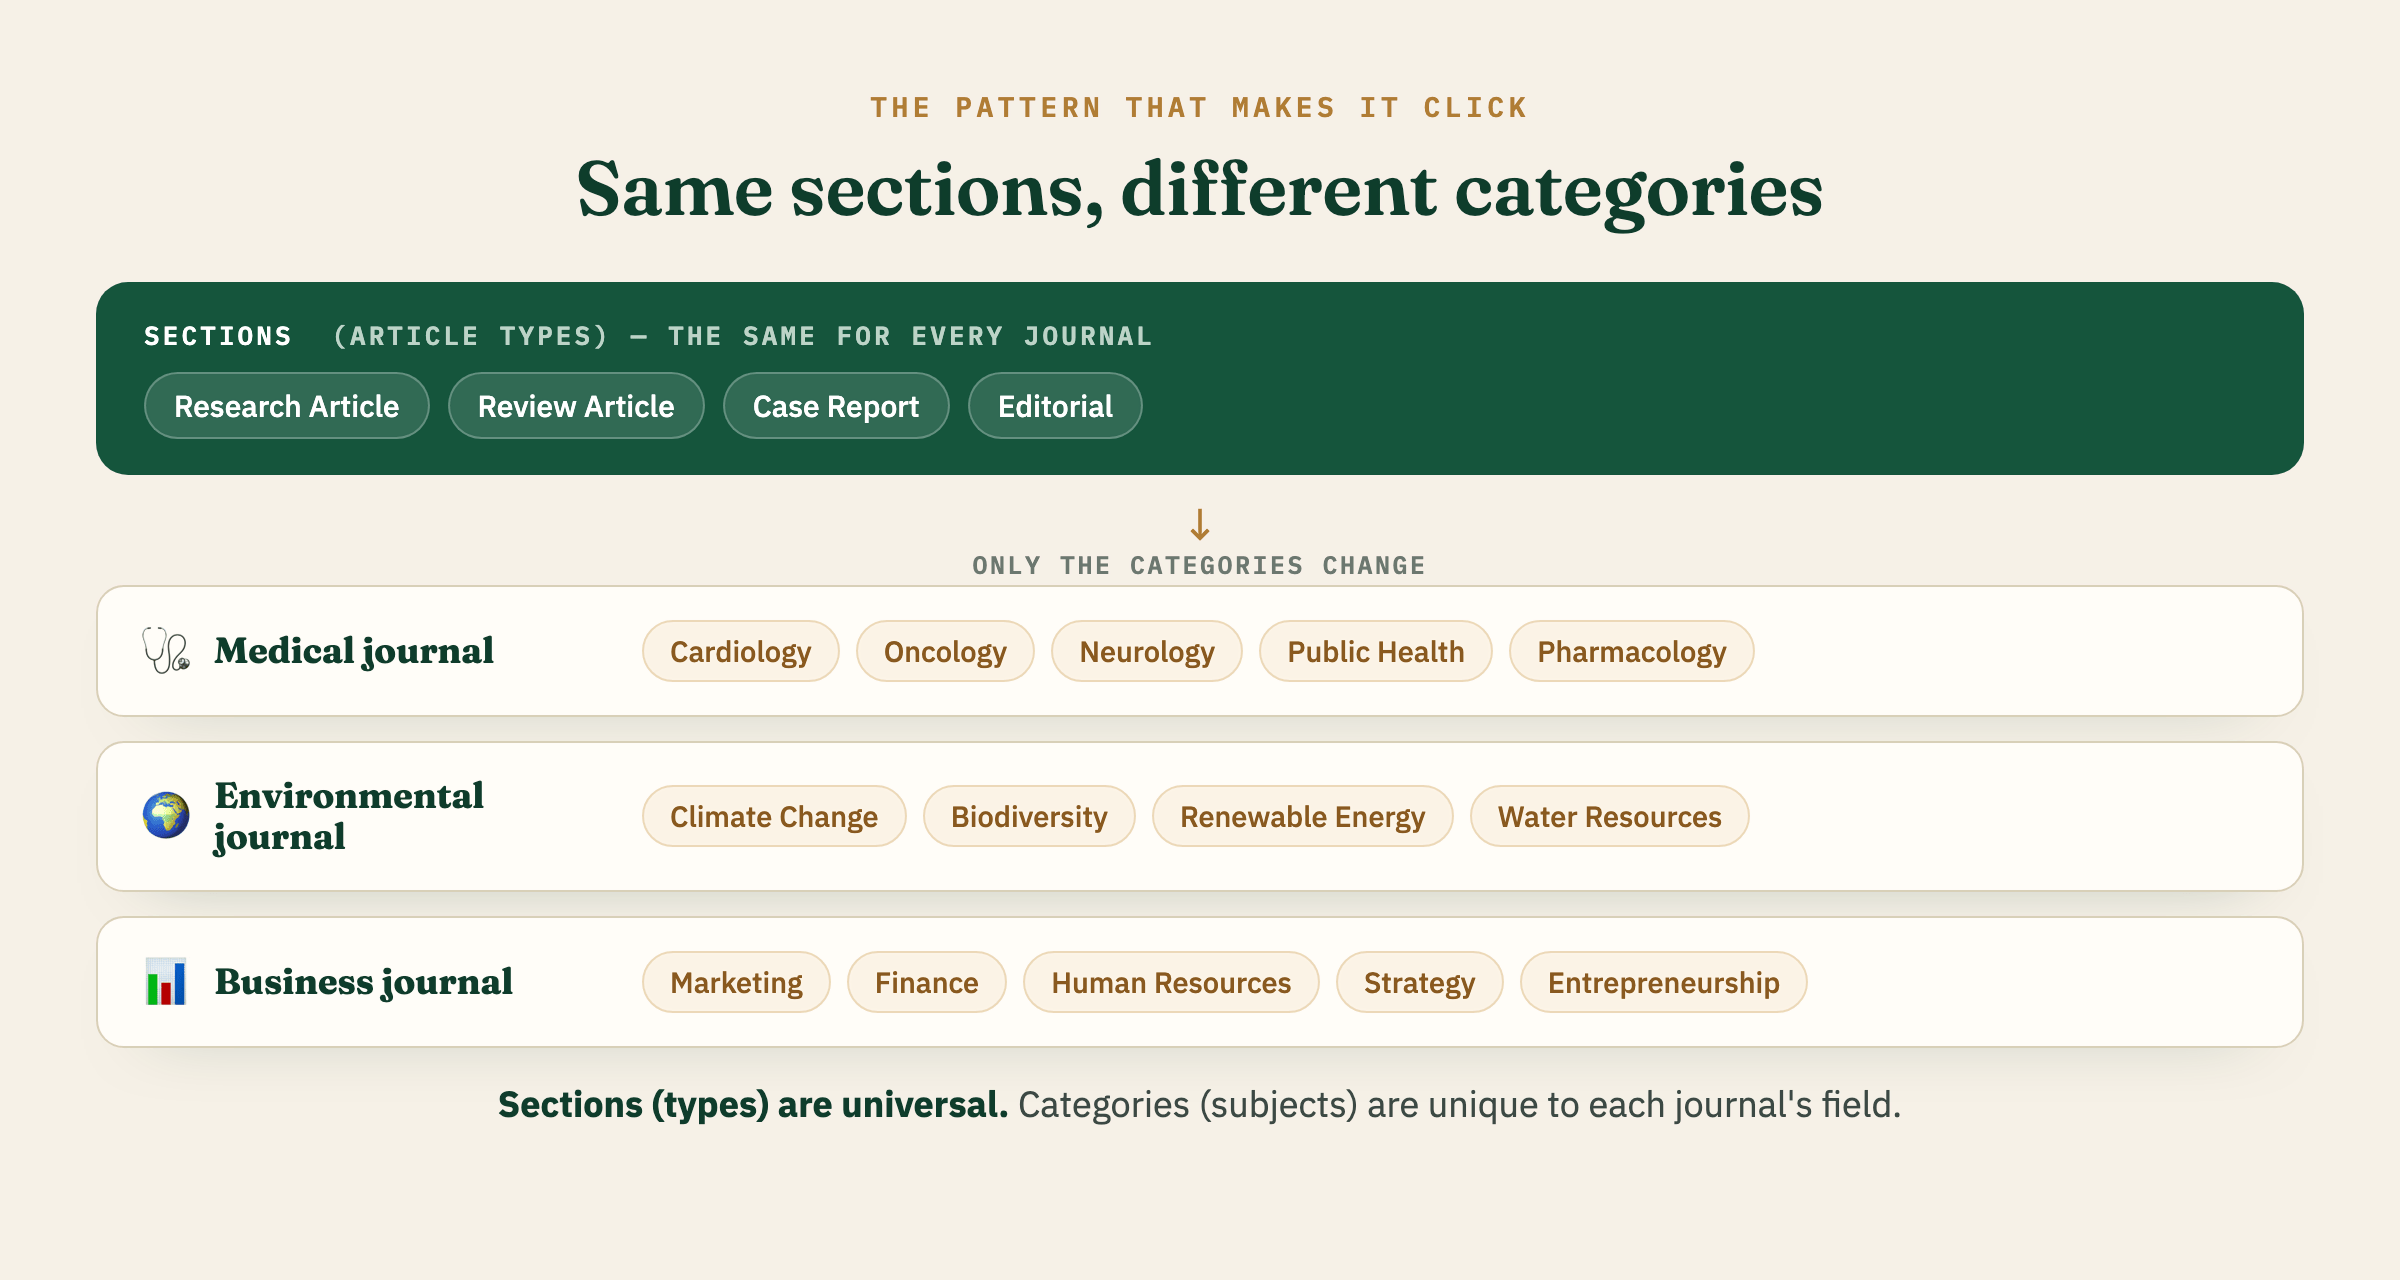
Here’s the pattern that makes everything click. Notice that the Sections (article types) stay almost identical from journal to journal — because article types are universal. What changes journal to journal is the Categories, because subjects are specific to each journal’s field.

Same sections, different categories across journals
The sections (article types) stay the same; only the categories (subjects) change from journal to journal.

1. A general medical journal

  • Sections (types): Research Article · Review Article · Case Report · Clinical Image · Editorial · Letter to the Editor
  • Categories (subjects): Cardiology · Oncology · Neurology · Infectious Diseases · Public Health · Pharmacology

A single case report on a heart-drug interaction could sit in both “Cardiology” and “Pharmacology” categories — while its section stays simply “Case Report.”

2. An environmental science journal

  • Sections (types): Research Article · Review Article · Short Communication · Perspective · Editorial
  • Categories (subjects): Climate Change · Biodiversity & Conservation · Water Resources · Renewable Energy · Pollution & Waste · Environmental Policy

A reader clicking “Renewable Energy” sees every relevant article from 2019 to today, whether it was a full research article or a two-page short communication.

3. An education journal

  • Sections (types): Research Article · Review Article · Case Study · Book Review · Editorial
  • Categories (subjects): Early Childhood Education · Higher Education · Educational Technology · Assessment & Measurement · Teacher Training · Inclusive Education

“Educational Technology” and “Higher Education” can both be tagged on one article about online learning in universities.

4. A business & management journal

  • Sections (types): Research Article · Review Article · Case Study · Viewpoint · Editorial
  • Categories (subjects): Marketing · Finance & Accounting · Human Resources · Entrepreneurship · Operations & Supply Chain · Strategy

Categories double as a de facto “explore by discipline” menu for readers who don’t care which issue an article appeared in.

5. A multidisciplinary / sustainability journal (categories aligned to the UN SDGs)

  • Sections (types): Research Article · Review Article · Short Communication · Commentary · Editorial
  • Categories (subjects): Quality Education · Good Health & Well-being · Clean Water & Sanitation · Affordable & Clean Energy · Climate Action · Sustainable Cities

Here categories act as a thematic index tied to a well-known framework — perfect for a browse block, and a single article can naturally serve more than one goal.

The mistake to avoid: mixing the two lists

The confusion almost always shows up the same way — the same labels appearing in both lists:

❌ Don’t do this

  • Sections: Original Research · Pharmacology · Clinical Medicine
  • Categories: Original Research · Pharmacology · Clinical Medicine

Here “type” and “subject” are tangled together, so neither list does its job: the Table of Contents is muddled, and topic browsing is meaningless because the topics duplicate the types.

✅ Do this instead

  • Sections (types): Original Research Article · Review Article · Case Report · Editorial
  • Categories (subjects): Pharmacology · Clinical Medicine · Medicinal Plants · Drug Safety · Hospital Practice

Same content — but now the Table of Contents is clean, and readers can still browse every topic across all issues. Keeping the two lists non-overlapping is exactly the right instinct; it simply works best when **Sections carry the type and Categories carry the *subject***.

Best-practice recommendations

  • Keep your section list short and type-based. Six to eight article types is plenty. Long, overlapping section lists make the Table of Contents messy and confuse both authors and indexers.
  • Use categories for subjects — and let them overlap freely. Multiple assignment is a feature, not a bug. That’s what makes topic browsing useful.
  • Turn on the Browse block (Website Settings → Appearance → Sidebar) so categories are actually visible to readers. Categories with no browse entry point are invisible work.
  • Never overload one field with both jobs. If you find yourself creating a section called “Cardiology,” that’s a sign a category is what you actually want.
  • State the article type in the PDF, regardless of how your sections are set up. This is what indexes look for.
  • Deactivate, don’t delete, when you retire a section that still holds published history.

FAQ

Can an article belong to two sections? No. One section per submission. If you need “an article that’s both a research article and belongs to the cardiology theme,” the theme goes in a category.

Can an article belong to two categories? Yes — as many as make sense.

Do categories affect my DOIs or Crossref deposit? No. DOI/Crossref deposits are article-level and don’t depend on categories. Categories are purely a website browsing feature.

Why does deleting a section feel so hard? Because OJS is protecting your data. A section with even one attached submission can’t be deleted, and forcing it risks orphaning those submissions. Reassign first, then delete.

Still unsure how to structure your journal’s sections and categories — or need help cleaning up an existing setup? OJS-Services.com supports 500+ journals across 29 countries with exactly this kind of configuration and migration work.

The post Sections vs. Categories in OJS: What’s the Difference, and Why Can’t I Delete My Section? first appeared on OPEN JOURNAL SYSTEM SERVICES.

Indexing Page Manager — Show Where Your Journal Is Indexed, Beautifully

June 17th 2026 at 2:04 am

If your journal is indexed in Scopus, Web of Science, DOAJ, TR Dizin, Crossref, or any other database, your readers and potential authors should know about it. Being listed in respected indexes is one of the strongest signals of journal quality — but OJS doesn’t offer a built-in way to showcase this information visually.

That’s exactly the problem our new Indexing Page Manager plugin solves. See Demo

What It Does

The plugin creates a dedicated indexing page on your journal’s website, displaying the databases and indexes you’re listed in as a clean, professional logo gallery. Think of it as your journal’s credibility wall — a single page where visitors immediately see that your journal meets the standards of major indexing services.

You don’t need any coding or template editing skills. Everything is managed through the OJS admin panel: upload a logo, add a label, set the display order, and you’re done. The page is generated automatically and integrates with your journal’s existing navigation.

Why This Matters

Authors choose where to submit based on visibility and prestige. A well-organized indexing page can be the deciding factor for a researcher choosing between your journal and a competitor. Instead of burying this information in an “About” page or listing index names in plain text, you present it as a visual gallery that communicates professionalism at a glance.

For journal managers handling multiple journals, maintaining consistent indexing pages across all publications becomes straightforward — install the plugin once and configure each journal independently.

Key Features

The plugin supports both English and Turkish out of the box, making it particularly useful for journals in Turkey and bilingual publications. You can add as many index entries as needed, each with its own logo and label. The layout is responsive and adapts to any OJS theme, so it looks good on desktop and mobile alike.

Since it works with OJS 3.3+, there’s no need to upgrade your installation to use it.

Free and Open Source

Like many of our plugins, the Indexing Page Manager is completely free. You can download it directly from the GitHub repository, install it through the OJS plugin gallery, and start using it right away.

Part of a Bigger Toolkit

We’ve built this plugin as part of our ongoing effort to fill the gaps in OJS that editors deal with every day. If you’re looking to improve other aspects of your journal’s setup, you might also find these useful:

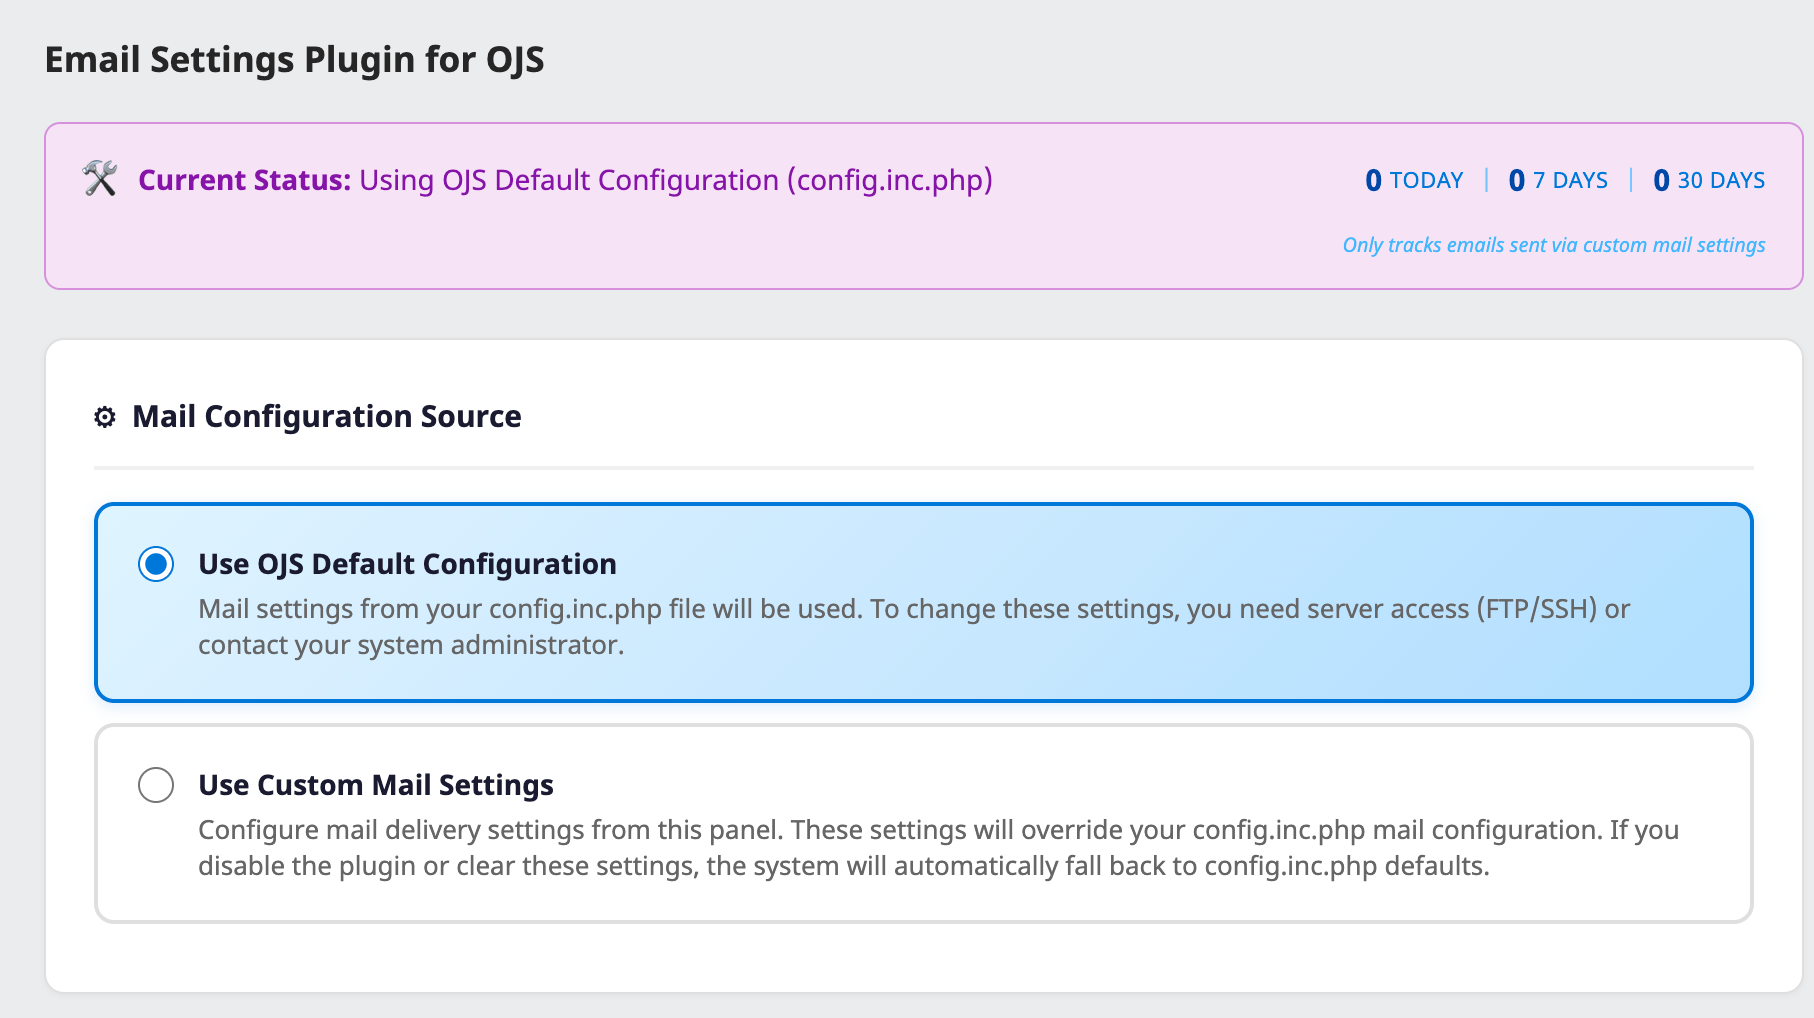
  • Email Settings Plugin — Configure SMTP, PHP mail, or Sendmail directly from the OJS interface without touching config files.
  • Registration Fields Plugin — Collect ORCID iDs and phone numbers at registration, across all themes.
  • Email Login Plugin — Let users log in with their email address instead of trying to remember a username.
  • Editorial Board Manager — Display your editorial board with photos, titles, and affiliations in a modern layout.
  • Review Certificate Pro — Generate professional, multi-language PDF review certificates with QR verification.
  • RePEc Pro Export — Export your economics journal to IDEAS and EconPapers with full metadata validation.

You can browse the full collection on our OJS Plugins page.

Get Started

Download the plugin from GitHub, upload it via Website → Plugins → Upload a New Plugin in your OJS dashboard, and enable it. Then head to the plugin settings to start adding your index entries.

If you have questions or need help with installation, reach out to us at info@ojs-services.com.

The post Indexing Page Manager — Show Where Your Journal Is Indexed, Beautifully first appeared on OPEN JOURNAL SYSTEM SERVICES.

Photo-Based Editorial Board Plugin — for OJS

June 14th 2026 at 1:11 am

Most OJS 3.3 and 3.5 journals present their editorial board the same way they did a decade ago: a flat HTML list of names and titles, no photos, no profile links, no specialty tags. The editorial board page — one of a journal’s most visible credibility signals — gets none of the attention the rest of the site receives. Improving it traditionally meant editing theme templates and re-doing the work after every OJS upgrade.

Editorial Board Manager was built to fix this. It is a generic OJS 3.3 and 3.5 plugin that takes over the /about/editorialTeam route automatically and replaces the default page with a modern, photo-based board. You manage everything from a dedicated Manage Editorial Board panel inside the OJS admin sidebar: upload an editor’s portrait, set their title, affiliation, country, specialty tags, biography in multiple languages, and the academic profile links that matter. The published page updates immediately. No template edits, no theme forks, no developer required.

▶ Live demo

Why this page deserves the attention

Two audiences read your editorial board page more carefully than any other page on your journal:

  • Authors deciding where to submit. A scholar choosing a journal opens the editorial board. They scan for names they recognise, fields close to theirs, and signals that the board is genuinely active. The faster they can answer those questions, the more likely they are to send you their paper.
  • Indexing committees. Scopus (CSAB), Web of Science (Master Journal List), DOAJ, ERIH PLUS and regional indexes all examine the editorial board page during journal evaluation. They look for full names, institutional affiliations, ORCID iDs, and links to verifiable academic profiles. They check geographic and institutional diversity. A names-only list with no photos, no profile links, and no specialty information reads as a “ghost editor” risk and weakens the application.

We built the plugin with both audiences in mind from day one. ORCID, Google Scholar, ResearchGate, Scopus, and Web of Science are first-class fields on every editor record — not free-text afterthoughts. Country flags and specialty tags are surfaced on every card. Each editor is marked up as a schema.org/Person so search engines and indexers can parse the page programmatically.

Core features

Eight academic profile platforms per editor. Email, ORCID, LinkedIn, personal website, Google Scholar, ResearchGate, Scopus author ID, and Web of Science ResearcherID. Each renders as a recognisable icon on the editor’s card — the identity an indexer wants to verify is one click away.

Six display templates, switchable with a single click:

  • Sectioned Cards (default) — large, readable, photos prominent
  • Hierarchical — grouped by role tier
  • Compact — more editors per screen for large boards
  • Magazine — richer per-editor layout
  • Table — the spreadsheet view some legacy reviewers still ask for
  • Atlas — map and flag led, for journals emphasising international reach

Bilingual content out of the box. Every text field — name, title, affiliation, specialty, biography — accepts Turkish and English values. Enable additional languages in OJS and the plugin picks them up automatically. No more duplicate editorial board pages for multilingual journals.

Built-in role categories. Editor-in-Chief, Deputy Editors, Section Editors, Advisory Board, Technical Editors, Language Editors, Former Editors, Guest Editors come pre-configured. Add your own categories when the standard set isn’t enough.

Country flags and specialty tags. The two visual cues that tell a reader — and an indexer — the geographic and disciplinary spread of your board.

Drag-and-drop ordering. Reorder editors inside a category with the mouse. No SQL, no manual position numbers.

CSV import. Onboard an existing board from a spreadsheet in one upload. A sample CSV is included.

Schema.org structured data. Every editor is marked up as a Person, so Google Scholar, search engines and indexers read the page correctly.

Sidebar integration. As soon as the plugin is enabled, a Manage Editorial Board entry appears in the OJS admin sidebar, right next to Submissions and Issues. No hidden settings page.

Theme-independent. The route override sits above the template layer, so the plugin works on the default OJS theme, on Health Sciences, on Manuscript, on Bootstrap3, on Immersion, on our own Nivo theme, and on any custom child theme. Migrate themes later and your editorial board page survives intact.

Technical requirements

  • OJS 3.3.0.22 or newer — and OJS 3.5 (PHP 7.4 or 8.0+)
  • MySQL/MariaDB or PostgreSQL — whichever your OJS already uses
  • About 2 MB of disk space; the plugin creates its own database tables on first activation
  • No external services, no API keys, no telemetry. Editor data never leaves your server.

Pricing

Buy now

One-time payment, lifetime updates for the major version, unlimited journals on a single OJS installation.

Free for our customers. If you have purchased one of our premium OJS themes or hold an active OJS hosting package, this plugin is included at no extra cost. Send us your order number and we’ll send the download link.

Source ships readable and unobfuscated under the GPL v2 licence. Installation, configuration and bug-report support by e-mail is included for the first ninety days after purchase.

Links

  • Live demo — twenty-one editors across eight role categories, all six templates available to preview
  • User guide — installation walk-through, admin panel tour, template selection, CSV import format
  • Product page — buy it, or claim it free if you already have one of our theme or hosting packages

The editorial board page is one of the easier pages to upgrade on a journal site, and one of the most rewarding. Set aside an afternoon: try the demo, read the guide, install the plugin. Your authors — and your next indexing review — will see the difference.

The post Photo-Based Editorial Board Plugin — for OJS first appeared on OPEN JOURNAL SYSTEM SERVICES.

ISSN, ISSN-L, ISSN-H, Print and Online ISSN: What All Those Codes Actually Mean?

June 8th 2026 at 12:07 am

If you have ever looked up your journal on the ISSN Portal, you may have been surprised to find not one number but several — something like this:

ISSN: 1808-057X
ISSN-L: 1519-7077
ISSN-H: 9120-4690

Add in the “Print ISSN,” “Online ISSN,” and “eISSN” labels you see scattered across databases, indexing services, and your own OJS settings, and a perfectly reasonable question follows: which one is my journal’s “real” ISSN, and what is the difference between all of them?

The short answer is that these are not competing numbers. They are different types of ISSN that describe the same publication from different angles. Once you know what each letter stands for, the picture becomes simple. Here is the full breakdown for journal editors and publishers.

First, what an ISSN actually is

An ISSN (International Standard Serial Number) is an eight-digit code that identifies a continuing resource — a journal, magazine, newspaper, or any publication issued over time. It is written as two groups of four characters separated by a hyphen, and the last character can be an X (used when a check-digit calculation lands on the value 10).

Two things are worth remembering:

  1. An ISSN carries no meaning of its own. It does not encode the country, subject, publisher, or quality of a journal. It is purely an identifier.
  2. Each medium gets its own ISSN. This is the key to understanding everything below. A journal that exists in print and online is, from the ISSN system’s point of view, two versions of the same work — and each version is assigned a separate number.

That second point is exactly why a single journal ends up with multiple ISSNs.

Print ISSN (p-ISSN) and Online ISSN (e-ISSN / eISSN)

These are the two you will encounter most often.

  • Print ISSN (p-ISSN) identifies the printed edition of the journal.
  • Online ISSN (e-ISSN) identifies the electronic/online edition. You will also see this written as eISSN or “Online ISSN” — they all mean the same thing.

So if your journal publishes both a print and a digital edition, it correctly has two ISSNs. Neither one is more “official” than the other; they simply point to different formats of the same content.

Example: Journal of Open Publishing releases a printed volume and a PDF/online edition.
• Print ISSN: 2345-6780
• Online ISSN: 2345-6799
Both are valid. A library cataloguing the print copy uses the first; an indexing service harvesting the online articles uses the second.

This is also why indexing services such as DOAJ, Scopus, and Crossref often ask specifically for your e-ISSN — they are dealing with the online version.

ISSN-L: the “Linking” ISSN

Here is the problem the previous section creates: if one journal can have several ISSNs (print, online, maybe CD-ROM in the old days), how does anyone know they all belong to the same publication?

That is what the ISSN-L (Linking ISSN) solves.

The ISSN-L is a single ISSN chosen to group together all the medium versions of one work. No matter how many formats a journal has, it gets exactly one ISSN-L, and that number acts as the master link tying the print, online, and any other editions together.

In practice, the ISSN-L is usually identical to one of the journal’s existing ISSNs — most often the first one assigned (frequently the print edition).

Example, continued: Our Journal of Open Publishing now has:
• Print ISSN: 2345-6780
• Online ISSN: 2345-6799
ISSN-L: 2345-6780 ← one number that represents “this journal, in any format”
When a database wants to merge the print and online records into a single journal entry, the ISSN-L is the value it uses.

If you only ever cite one number when you want to refer to the journal as a whole — regardless of format — the ISSN-L is a strong candidate.

ISSN-H: the “History” ISSN

This is the newest type, and the one most editors have never heard of. It was introduced with the latest version of the ISSN standard (ISO 3297:2020) and is still being rolled out across the ISSN Portal, so not every journal has one yet.

While ISSN-L groups versions across formats (print vs. online), ISSN-H (History ISSN) groups versions across time — specifically, the chain of titles a publication has carried over its lifetime.

Journals are renamed, merged, and split more often than people realize. A publication might begin life as Bulletin of Regional Studies, become Regional Studies Review, and later International Review of Regional Science — all genuinely the same ongoing journal, but each title change triggers a brand-new ISSN. Over the decades, one journal can accumulate four or five different ISSNs and catalogue records, which makes its history hard to follow.

The ISSN-H ties that whole succession of titles together under a single cluster identifier, so the entire lineage can be retrieved and even displayed as one connected history.

A practical thing to notice: ISSN-H numbers are newly minted cluster identifiers, not one of the journal’s everyday ISSNs. They currently appear in a distinctive range — you will often see them starting with a 9 (as in the 9120-4690 example at the top). That is your visual cue that you are looking at a history cluster, not a medium-specific number.

Don’t worry if your journal has no ISSN-H. Full assignment is an ongoing project. Its absence simply means the cluster hasn’t been generated for your title yet — it says nothing about the validity of your journal’s ordinary ISSNs.

Putting it all together

Going back to the example from the top of this article:

ISSN: 1808-057X → one specific medium version (here, the online edition)
ISSN-L: 1519-7077 → links all format versions of this journal together
ISSN-H: 9120-4690 → links this journal to its earlier/later renamed titles

Nothing is contradictory. You are looking at one journal described at three levels of grouping: a single edition, the family of formats, and the family of titles over time.

Quick reference

Type Stands for What it groups One per…
ISSN International Standard Serial Number A single edition of a publication Medium (print, online, etc.)
p-ISSN Print ISSN The printed edition Print version
e-ISSN / eISSN Electronic / Online ISSN The online edition Online version
ISSN-L Linking ISSN All format versions of one work Work (across media)
ISSN-H History ISSN All successive titles over time Title lineage (across time)

What this means for your OJS journal

If you run a journal on OJS (Open Journal Systems), your journal settings include fields for both a Print ISSN and an Online ISSN. A few practical pointers:

  • If your journal is online-only (as most modern OJS journals are), fill in the Online ISSN (e-ISSN) and leave the Print ISSN empty. Do not invent or reuse a print ISSN you don’t actually have.
  • Enter ISSNs in the correct field. Indexing services and harvesters read these values, and putting a print number in the online slot (or vice versa) causes mismatches in DOAJ, Crossref, and discovery databases.
  • When an index, Crossref, or a DOI registration asks for the ISSN, it almost always wants your e-ISSN — the identifier for the version that is actually online.
  • The ISSN-L is useful when you want a single value that represents your journal as a whole, independent of format.
  • You generally won’t need to enter an ISSN-H anywhere in OJS; it is a portal-level cluster maintained by the ISSN International Centre, not something you assign yourself.

Getting these identifiers right is one of the quieter but more important parts of running a well-indexed journal — it is how the wider scholarly infrastructure knows that your print edition, your online edition, and your journal’s earlier names are all, in fact, you.

Need help configuring your journal’s metadata, ISSNs, or indexing settings in OJS? That’s exactly what we do at ojs-services.com.

The post ISSN, ISSN-L, ISSN-H, Print and Online ISSN: What All Those Codes Actually Mean? first appeared on OPEN JOURNAL SYSTEM SERVICES.

Getting your journal indexed: what to do before you apply

June 4th 2026 at 9:49 pm

What indexing is, when to apply, and how to prepare your website, your articles and your author base. A plain-English guide for editors and journal owners — no jargon, with a readiness checklist at the end.The basics
What indexing is & why it matters

An index (or database) evaluates academic journals against a set of quality criteria and lists those that qualify. Once a journal is indexed, its articles become far easier for researchers to discover, are more likely to be cited, and the journal earns greater trust within the scholarly community.

In short, being indexed grows three things: visibility (your articles surface in searches), credibility (an independent body has vetted your journal) and your readership and author pool (a journal in a respected index attracts stronger submissions).

A common confusion: not every index carries the same weight. Automatic discovery services like Google Scholar include almost everyone and are not a mark of quality. Editorially reviewed databases like DOAJ, Scopus, Web of Science, PubMed/MEDLINE and EBSCO are the ones that signal real credibility.

Classification
Types of indexes

To plan a sensible strategy, it helps to think of indexes in four broad groups:

A  Discovery crawlers
Automatic, no application needed. E.g. Google Scholar. Good for visibility, but not proof of quality.
B  Open-access directories
Measure open access & transparency. E.g. DOAJ. For most journals this is the first serious target.
C  Citation / quality databases
The most selective tier. E.g. Scopus, Web of Science (SCIE, SSCI, ESCI). Full editorial review.
D  Subject databases
Focused on one field. E.g. PubMed/MEDLINE (health), EBSCO collections, ERIC (education), EconLit.

Mindset
Don’t wait for perfection to start

One of the most common questions we receive is some version of: “Do I need everything — the website, the policies, the indexing — ready before I launch the journal?” The answer is no, and waiting for that is the single biggest reason journals never get off the ground.

Indexing is not a prerequisite for publishing — it is a reward for publishing well, consistently, over time. No major index will even consider a journal that has not yet published. So the order is the opposite of what many people imagine:

1
First
Set up the website & the journal
Get a proper journal platform (e.g. OJS) running, with your core pages and policies in place. This is the foundation — it does not need to be flawless on day one.
2
Then
Publish your first issue (≈5+ articles)
Run real submissions through peer review and release your first issue with a meaningful number of articles. This proves the journal is alive and working.
3
Early on
Apply for and obtain your ISSN
Register with your national ISSN centre and get your number (preferably an e-ISSN). Almost every index requires it, so do this as soon as you are publishing.
4
From here on — in parallel
Keep publishing while preparing for indexes
This is the key idea: run two tracks at once. On one track you prepare and publish the next issue on schedule; on the other you steadily strengthen policies, metadata, DOIs and author diversity so you are ready to apply to DOAJ, then Scopus / Web of Science and beyond.
The takeaway: launch first, publish consistently, and build toward indexing as you go. A journal with two solid published issues and growing is far closer to indexing than a “perfect” journal that has never released a single article.

Timing
When to apply

Applying to a major index too early — before the journal has matured — usually ends in rejection. Worse, some indexes impose a waiting period (often 6–12 months) before you can reapply. So timing matters. You are generally in good shape to apply once most of the signals below are true:

You have a valid ISSN.

Preferably an e-ISSN; your journal should be listed on portal.issn.org.

You have a real publishing track record.

A common expectation: roughly a year of regular publishing, and at least 5 peer-reviewed research/review articles per year (DOAJ’s minimum volume).

Your publication schedule is consistent.

Issues appear on time, without long gaps. Irregularity is one of the most common rejection reasons.

Your policy & masthead pages are complete.

Peer review, ethics, copyright, open access and editorial board are all published on the site.

Your content isn’t single-author or single-institution.

Submissions from different institutions — and ideally different countries — have started to come in.
Practical advice: set your targets in stages. With a new journal, don’t go straight for Scopus — first build Google Scholar visibility and prepare for DOAJ. That groundwork is exactly what the top-tier indexes look for later.

Preparation · 1
Website & transparency

Almost every index shares one expectation: who the journal is, how it works and what it promises must be clearly stated on the site. Reviewers typically visit your website first. Make sure each of the following is present, clear and up to date:

Journal name & identity

A unique, non-misleading name shown consistently on the homepage and the “About the Journal” page.

Editorial board

Members listed with name, affiliation, country and ideally academic profile links (ORCID, institutional page).

Author guidelines & submission rules

The submission process, formatting requirements and ethical criteria spelled out in detail.

Peer review process

State clearly which type of review you use (e.g. double-blind). All content must be reviewed.

Publication ethics policy

How you handle plagiarism, conflicts of interest and misconduct — ideally referencing COPE guidelines.

Open access & copyright policy

Whether access is free, and who holds copyright (e.g. an appropriate Creative Commons licence).

Publication frequency

How often the journal is published (e.g. 2 or 4 issues per year) must be clearly stated.

Ownership & management

The owner/publisher and contact details should be visible.

A healthy website

No broken links, no inaccessible PDFs, no outdated information. This shows the journal is actively maintained.
Note: If you run OJS, most of these are configured under Settings → Journal / Website / Workflow. The structure already follows the standards — your job is simply to fill in every field completely and consistently.

Preparation · 2
Article quality & technical standards

Indexes judge a journal not only by its policies but by the content it actually publishes. There are two dimensions: the scholarly quality of the work, and its technical/metadata hygiene.

Scholarly quality

Original, peer-reviewed articles with clear methods and proper references. A balance weighted toward original research (rather than mostly reviews or translations) is preferred. Every published item must genuinely have passed peer review.

Technical & metadata standards

English metadata

Even for non-English articles, provide an English title, abstract and keywords — critical for international indexes.

DOI assignment

A persistent identifier (Crossref DOI) for every article is a strong plus.

Full-text access

Each article must be individually accessible, downloadable and directly linkable — a single bundled PDF is not enough.

Clean references

A consistent citation style and, where possible, DOI links in the reference list.

Machine-readable format

HTML and/or JATS XML full text makes it far easier for indexes to harvest your content.
Tip: Crossref membership and DOI assignment, metadata sharing via OAI-PMH, and HTML/JATS XML full text — these three put you ahead of competing journals when you move up to the top-tier indexes.

Preparation · 3
Author & country diversity

Something many journal owners overlook — but which the top-tier indexes (especially Scopus and Web of Science) take seriously: showing that your journal is an international scholarly platform, not a local bulletin. Diversity is how you prove it.

i  Author diversity
Articles shouldn’t all come from one institution or the same small group of authors. Contributions from a range of universities break the “closed journal” perception.
ii  Geographic spread
Authors from more than one country, where possible. International contribution is the clearest sign of genuine global interest.
iii  Editorial board diversity
A board drawn from several institutions and countries, made up of recognised names in the field.
iv  Reviewer pool
A broad, independent pool of reviewers demonstrates the impartiality of your review process.
Why it matters: indexes are wary of closed journals where a handful of people publish each other’s work. Diversity signals impartiality, reach and real academic impact. Build it authentically — by genuinely promoting your journal internationally — not through artificial shortcuts.

Strategy
Which index to start with

The healthiest path is to climb the indexes in order, as your journal matures. This staged route works for most journals:

1
Visibility · Immediately
Google Scholar & basic crawlers
No application needed; if your site is configured correctly it is crawled automatically. Gives early visibility and lets citations start to accumulate.
2
First serious target · After ~1 year
DOAJ (Directory of Open Access Journals)
Proves your open-access and transparency standards. Expects roughly a year of publishing or 5+ research articles per year, a clear licence and complete policy pages. A strong stepping stone toward higher indexes.
3
Databases & your field
EBSCO & subject databases
Aggregators like EBSCO and discipline-specific databases — e.g. PubMed/MEDLINE for health sciences, ERIC for education — are realistic mid-stage targets that widen your reach within your field.
4
Top tier · Mature journals
Scopus & Web of Science
The most selective targets. They require consistency, international author and board diversity, citation performance and complete metadata. Apply here only after you’ve solidly cleared the lower rungs.

Watch out
Common mistakes
×Waiting until everything is “perfect” before launching — instead of publishing and improving in parallel.
×Applying to major indexes too early, with thin or incomplete content.
×Policy pages (ethics, peer review, copyright) that are missing or contradict each other.
×Broken links, inaccessible PDFs and outdated information.
×Missing English abstracts and keywords.
×Content limited to a single institution or author group.
×An irregular publication schedule with delayed issues.
×Paying to be “listed” by predatory indexes and mistaking it for real indexing — it costs you credibility.
Golden rule: if an index asks for a fee but performs no genuine editorial review, stay away. Reputable databases evaluate your content — they don’t sell you a spot on a list.

Summary
Am I ready? Quick checklist

If you can answer “yes” to all of the following, you are most likely ready to apply:

You have a valid ISSN and an ISSN Portal listing.
You’ve published for ~1 year, or have 5+ peer-reviewed articles per year.
Ethics, peer-review, copyright and open-access policies are complete on the site.
The editorial board is listed with affiliation and country.
Articles carry English abstracts + keywords and, ideally, DOIs.
Every article has full-text access and there are no broken links.
Content comes from varied institutions/authors; international contribution has begun.
Your publication schedule runs on time, without gaps.

Let’s get your journal index-ready

From setting up a standards-compliant OJS journal to bringing an existing journal up to international standards — DOI, open access, metadata and indexing preparation — we’re here to help.

Get in Touch

This guide is for general information; always follow each index’s official, current criteria when you apply.

The post Getting your journal indexed: what to do before you apply first appeared on OPEN JOURNAL SYSTEM SERVICES.

From Print to Digital: PDF, HTML, or XML – What Should Academic Journals Publish Today?

April 12th 2026 at 7:52 pm

A practical guide for journal editors navigating the format transition in scholarly publishing

Over the past year, our team at FullTextCreator has been building a system that converts academic article PDFs and Word documents into full-text HTML and JATS XML. We built it because the demand was there — and it keeps growing.

Journals want to publish in multiple formats. Indexing databases increasingly require structured content. Authors expect their work to be discoverable, readable, and citable across platforms. And yet, when we process hundreds of articles from dozens of journals, we keep seeing the same reality: most academic content is still locked inside PDFs designed for a printer that doesn’t exist anymore.

This post is about why that matters — and what to do about it.

If you’re looking for practical guidelines on how to prepare a well-structured academic PDF, we’ve already written a detailed guide on creating machine-readable academic PDFs. Consider that a companion piece to this one.

PDF: A Tool Designed for Print

The PDF format was created in the early 1990s to solve a very specific problem: how do you ensure a document looks exactly the same on every screen and every printer, regardless of operating system or software? The answer was to freeze the layout — to treat the page like a photograph.

For print publishing, this was revolutionary. For digital-first academic publishing, it’s increasingly a limitation.

A PDF is a visual container. It knows where every word is on the page. It does not know that a bold centered line is a section heading, that a superscript number is a citation, or that a block of indented text is an abstract. Machines can see a PDF, but they cannot easily understand it.

This matters more than ever. The academic ecosystem now includes:

  • Search engines that need to parse and rank your content
  • Indexing databases (PubMed, Scopus, Web of Science) that need to extract metadata
  • AI-powered research tools (Semantic Scholar, ResearchRabbit, Perplexity, Elicit) that need to read and summarize full text
  • Reference managers (Zotero, Mendeley) that need to extract citations
  • Accessibility tools that need to serve content to readers with visual impairments
  • Translation pipelines that need clean, structured text

PDF can serve some of these purposes — but only if the PDF itself is carefully structured. In most cases, it serves none of them particularly well.

We Are in a Transition Period

Let’s be honest: PDFs are not going away. And for good reasons.

Many indexing requirements still mandate a PDF full-text submission. TR Dizin, for example, requires a PDF. Several EBSCO and DOAJ policies are built around PDF availability. Authors are accustomed to downloading and sharing PDFs. Peer reviewers expect them. Citation managers import them. Institutions archive them.

More importantly: the habits of a generation of academics are built around the PDF paradigm. You cannot simply replace it overnight, even if you wanted to.

What we are seeing — across PKP’s Open Journal Systems community, among Scopus-indexed journals, and among publishers preparing for PubMed Central submission — is a gradual shift toward multi-format publishing. The PDF stays, but it is no longer alone. Alongside it:

  • A full-text HTML version optimized for browser reading
  • A JATS XML file for databases and long-term interoperability
  • Sometimes an ePub for mobile reading apps

This is not a radical proposal. It is what Nature, PLOS, eLife, and virtually every major academic publisher already does. The question for smaller and mid-sized journals is: when do we start, and how?

The Case for Full-Text HTML

HTML is how the web was built. It is what browsers read natively. And it has specific advantages for academic content that are easy to underestimate.

Readability without a download. A reader on a mobile phone can open an HTML article directly in their browser. No app needed, no 5MB file to download, no PDF viewer struggling to reflow text for a small screen. On mobile — which now accounts for a significant portion of academic reading — HTML wins by a large margin.

Better indexing by search engines. Google Scholar, Bing Academic, and general web crawlers index HTML content more accurately and more completely than PDFs. Headings, keywords, abstracts, author names, and citations embedded in structured HTML are more reliably extracted and ranked.

Accessibility. Screen readers, browser zoom functions, contrast settings, and dyslexia-friendly fonts all work seamlessly with HTML. PDF accessibility requires additional tagging work that most journals skip entirely.

Linking and interactivity. HTML enables clickable reference lists, internal section links, embedded figures with captions, supplementary material expansion, and DOI links that work inline. A PDF is static; HTML is alive.

Compatibility with AI research tools. Tools like Elicit, Consensus, Semantic Scholar, and even general-purpose LLMs process text far more accurately when it is clean HTML than when it is extracted from a PDF. As AI-assisted literature review becomes standard in academic workflows, HTML-published content will have a measurable advantage in discoverability and citation.

The Case for JATS XML

JATS (Journal Article Tag Suite) is the XML standard used by PubMed, PMC, Crossref, and most major academic databases for structured article exchange. If HTML is the format for readers, JATS XML is the format for machines and systems.

PubMed Central requires it. If your journal is applying for or maintaining PubMed/PMC indexing, JATS XML is mandatory. There is no workaround.

Metadata richness that PDF cannot match. A JATS XML file can encode author ORCID IDs, funding information with Funder Registry identifiers, contributor roles (CRediT taxonomy), structured reference lists with DOIs, figure descriptions, license terms, and dozens of other metadata fields — all in a machine-readable, standardized way. This is the difference between having metadata and communicating it to every system that touches your content.

Portability and long-term interoperability. JATS XML is format-agnostic. From a single well-formed XML file, you can generate HTML, PDF, ePub, or any future format. It is the master record from which everything else can be derived. This is why major publishers maintain JATS XML as their canonical content format.

Future-proofing for AI and data mining. Academic data mining — the large-scale analysis of scientific literature for trends, systematic reviews, and AI training — operates almost entirely on structured XML. Journals that publish JATS XML contribute to and benefit from this ecosystem. Journals that publish only PDF are largely invisible to it.

Crossref metadata deposit. When you register a DOI with Crossref, the metadata you deposit determines how well your article is matched in citation indexes. JATS XML enables richer, more accurate Crossref deposits than manual metadata entry.

What About Metadata? The Invisible Foundation

One pattern we see repeatedly in our conversion work: journals that are eager to publish HTML or XML, but whose source PDFs are missing the very metadata that makes structured publishing possible.

No ORCID IDs for authors. No clear received/accepted dates. No DOI on the first page. References without DOIs. Keywords buried in the abstract text without a clear label.

Structured formats are only as good as the data that goes into them. Before investing in HTML or XML publishing, it is worth auditing your current PDF production workflow against a basic metadata checklist. We wrote that checklist here: Creating Machine-Readable Academic PDFs.

A Practical Path Forward

For most journal editors reading this, the question is not philosophical — it is operational. You have a small team, a limited budget, and a backlog of articles to process. Here is a realistic framework:

Step 1: Fix the PDF first.
A well-structured PDF with complete metadata is the foundation. If your PDF production is inconsistent, HTML and XML outputs will inherit those problems. Use the checklist linked above.

Step 2: Add HTML for current issues.
Full-text HTML for new articles is achievable with existing tools. OJS supports HTML galley uploads natively. Even a basic, clean HTML version is a significant upgrade over PDF-only publishing.

Step 3: Pursue JATS XML for indexing goals.
If your journal is targeting PubMed, pursuing higher Scopus standing, or preparing a Plan S compliance statement, JATS XML is the path. This is more complex, but the infrastructure exists to support it.

Step 4: Don’t do it manually.
Manual conversion of PDFs to HTML or JATS XML is slow, expensive, and error-prone. Automation — whether through your own typesetting workflow, a conversion service, or a platform like FullTextCreator — is the only scalable approach.

Why We Built FullTextCreator

This is not a theoretical discussion for us. We built FullTextCreator precisely because we saw how much friction existed between a journal’s content and its full digital potential.

The service accepts PDF or Word document uploads and produces clean full-text HTML and JATS XML — structured, metadata-rich, and ready for OJS galley upload or database submission. The demand since launch has been consistent and growing, particularly from journals in Turkey, Eastern Europe, and Southeast Asia that are navigating indexing requirements for the first time or preparing PMC applications.

The problem we keep solving is the same: a journal has years of well-written, peer-reviewed content, but it is locked in PDFs that no database can properly read. Format conversion is the bridge between the content that exists and the visibility it deserves.

Conclusion

The academic publishing format question is not PDF versus HTML versus XML. It is PDF plus HTML plus XML — a multi-format strategy that serves readers, machines, indexing databases, and AI tools simultaneously.

PDF remains essential for the foreseeable future. But journals that publish only in PDF are leaving discoverability, accessibility, and indexing potential on the table. The transition is already underway at every level of the scholarly publishing ecosystem. The question is not whether to make the shift, but how to do it efficiently.

For journals serious about visibility, indexing, and future-proofing their content: the format upgrade is not optional. It is infrastructure.


Looking for hands-on help with format conversion? Visit fulltextcreator.com or explore our OJS hosting and services for academic journal support.

The post From Print to Digital: PDF, HTML, or XML – What Should Academic Journals Publish Today? first appeared on OPEN JOURNAL SYSTEM SERVICES.

Why Zenodo DOI for Academic Journals?

March 30th 2026 at 1:29 am

Zenodo is a free, open-access repository developed by CERN that allows researchers and publishers to assign Digital Object Identifiers (DOIs) to their publications — completely free of charge. Unlike commercial DOI providers, Zenodo offers unlimited DOI registration with no annual fees, making it an ideal solution for academic journals operating on limited budgets.

With a Zenodo DOI, your articles gain permanent, citable identifiers that are indexed by major academic databases, ensuring long-term discoverability and accessibility for the global research community.

How Zenodo DOI Works — What to Expect

It’s important to understand how Zenodo DOIs differ from services like CrossRef or DataCite. When you assign a DOI through Zenodo:

  • The DOI link (e.g., https://doi.org/10.5281/zenodo.12345) resolves to the Zenodo record page, not directly to your journal website.
  • Zenodo stores a copy of your article (PDF and metadata) as an open-access archive on its platform.
  • Your journal URL is included in the Zenodo metadata, so readers can easily find and visit your journal from the Zenodo page.

This is different from CrossRef, where the DOI link points directly to the article on your journal website. With Zenodo, your article gains an additional presence on a trusted, CERN-hosted repository — providing extra visibility, long-term preservation, and credibility. Many journals use Zenodo DOIs as a cost-free alternative to commercial DOI services, and the Zenodo landing page serves as a secondary access point that complements your journal.

The Challenge: A Tedious Manual Process

While Zenodo provides an excellent free DOI service, the process of depositing articles is entirely manual. For each article, journal editors must:

  1. Log in to Zenodo and create a new upload to reserve a DOI
  2. Copy the DOI and add it to the article’s PDF and OJS metadata
  3. After publishing the article in OJS, return to Zenodo
  4. Manually enter all metadata — title, authors, affiliations, abstract, keywords
  5. Fill in publishing information — journal name, ISSN, volume, issue, page numbers
  6. Upload the PDF file
  7. Review everything and publish the record

This process takes 10–15 minutes per article and is highly prone to errors — typos in author names, missing affiliations, incorrect page numbers, or forgotten keywords. For journals publishing 30–100+ articles per year, this becomes a significant burden on editorial staff.

Our Solution: Zenodo DOI Sync Plugin for OJS

Based on direct feedback and requests from our OJS clients and the academic publishing community, we developed the Zenodo DOI Sync Plugin — a comprehensive integration that automates the entire Zenodo deposit workflow directly from within OJS.

What previously took 10–15 minutes of manual data entry per article now takes a single click and a few seconds. All metadata is pulled directly from OJS, eliminating human error and ensuring consistency between your journal and Zenodo records.

We continue to actively develop this plugin and provide dedicated support based on user feedback and evolving Zenodo API requirements.

Key Features

🔑 Secure Token-Based Authentication

The plugin connects to Zenodo using your personal access token — no passwords stored, no complex OAuth flows. Simply generate a token from your Zenodo account and paste it into the plugin settings. Each journal can have its own Zenodo account and token.

🏷️ One-Click DOI Reservation

Reserve a DOI from Zenodo without leaving OJS. The DOI is automatically saved to the article’s identifier field. No need to switch between OJS and Zenodo.

📋 Automatic Metadata Synchronization

With a single click, the plugin transfers all article metadata to Zenodo:

  • Title — in the article’s original language
  • Authors — with full names, affiliations, and ORCID identifiers
  • Abstract — with HTML formatting preserved (bold, italic, paragraphs)
  • Keywords — all subject keywords from the article
  • Journal Information — journal name, ISSN, volume, issue, page numbers
  • Publication Date — from the OJS publishing date

📄 Automatic File Upload

The plugin automatically uploads all galley files (PDF and others) from OJS to Zenodo. It handles file cleanup — removing old files before uploading new ones — ensuring your Zenodo record always matches your OJS content.

🌐 Zenodo Community Integration

If your journal has a Zenodo community, the plugin can automatically associate new deposits with your community. Simply enter your community slug in the settings, and every new DOI reservation will be linked to your community page.

🚀 Publish to Zenodo from OJS

Once your article is published in OJS, you can publish it to Zenodo with one click. The plugin handles metadata sync, file upload, community review submission, and publication — all in a single operation.

📊 DOI Management Dashboard

A dedicated management page in the OJS sidebar gives you a complete overview of all articles and their Zenodo status:

  • Filter by Zenodo status (Draft / Published), OJS status, or issue
  • Search by title, DOI, or article ID
  • Sort by any column
  • Sync or publish individual articles directly from the dashboard
  • Color-coded status badges for instant visual overview

🔄 Legacy DOI Scanner

Already have articles with Zenodo DOIs that were created manually? The built-in scanner finds all existing Zenodo DOIs in your journal, checks their current status on Zenodo (draft or published), and updates the local database — so you can manage everything from one place.

🌍 Multi-Language Support

The plugin interface is fully translated in English and Turkish, with support for additional languages. All labels, messages, and notifications adapt to your OJS language setting.

🔒 Role-Based Access Control

Only Site Administrators and Journal Managers can access Zenodo features. Authors, reviewers, and other users cannot see or interact with DOI management tools.

What’s Included

  • ✅ Full plugin with all features described above
  • ✅ Installation and configuration support
  • ✅ Zenodo account and token setup assistance
  • ✅ Community configuration help
  • ✅ Free updates for compatibility and improvements
  • ✅ Ongoing technical support

Continuous Updates & Important Notes

This plugin is actively maintained and regularly updated to keep pace with OJS releases and Zenodo API changes. All updates are provided free of charge.

A note about Zenodo: Zenodo is an independent service operated by CERN with its own policies and eligibility criteria. While Zenodo offers free DOI registration for most academic content, they may apply restrictions on certain types of publications or journals at their discretion. Such policies are determined solely by Zenodo and are outside the scope of this plugin. We recommend checking Zenodo’s policies to confirm eligibility for your journal.

Compatibility

  • OJS Version: 3.3.x
  • PHP: 7.4, 8.0, 8.1
  • Zenodo API: InvenioRDM REST API

Get the Plugin →

The post Why Zenodo DOI for Academic Journals? first appeared on OPEN JOURNAL SYSTEM SERVICES.

RepecPro – RePEc Export Plugin for OJS 3.3 & 3.4

March 25th 2026 at 7:18 pm

If your journal publishes research in economics, finance, business, or related social sciences, getting indexed in RePEc (Research Papers in Economics) is one of the most effective ways to boost your visibility — and it’s completely free.

RePEc is a decentralized, volunteer-driven platform that distributes your research metadata across a vast network of services including IDEAS, EconPapers, CitEc, Google Scholar, EconLit, ResearchGate, and many more. With over 4,200 journals and 70,000 registered authors across 104 countries, it’s one of the largest open bibliographic databases in the social sciences.

But here’s the catch: joining RePEc requires creating structured metadata files in ReDIF format, maintaining a specific directory structure, and keeping everything updated as you publish new issues. For most journal teams, this is tedious, technical, and error-prone.

That’s exactly why we built RepecPro.

What Is RepecPro?

RepecPro is a professional export plugin for Open Journal Systems (OJS) that fully automates your journal’s RePEc integration. No need to learn ReDIF syntax, no manual file management, no worrying about directory structures. Install the plugin, enter your RePEc archive details, and export — it’s that simple.

RepecPro supports both OJS 3.3.x and OJS 3.4.x.

Key Features

Automated ReDIF Template Generation

RepecPro automatically generates all required ReDIF files — archive template, series template, and individual article templates — directly from your OJS article metadata. Titles, authors, abstracts, keywords, publication dates, DOIs, PDF links — everything is mapped correctly.

Full Export & Selective Export

Export your entire journal catalog with a single click using Full Export, or selectively export specific issues or individual articles. Perfect for both initial setup and ongoing updates.

Auto-Export on Publication

Enable automatic export and RepecPro will generate ReDIF files whenever a new article is published. No manual intervention needed — your RePEc archive stays up to date automatically.

Directory Structure & Index Files

RepecPro creates and manages the complete directory structure that RePEc’s crawler requires, including HTML index files at every level. Your archive is HTTP-accessible and ready for RePEc’s mirroring software from day one.

Configuration Validator

Before exporting, run the built-in Validate Configuration tool to check that all required settings are properly configured. Catch issues before they become problems.

Export History & Logging

Every export operation — whether manual or automatic — is logged with detailed information: date, type, status, article count, and any errors. The Recent Exports tab gives you a complete audit trail.

Multi-Language Support

Full interface support in English and Turkish, with contextual help text for every settings field.

Smart Defaults

RepecPro pre-fills settings with sensible defaults based on your journal’s existing OJS configuration — journal name, ISSN, publisher, and more. Just review and adjust as needed.

How It Works

  1. Install — Upload the plugin via OJS Plugin Gallery or manually
  2. Configure — Go to Tools → Import/Export → RepecPro and enter your RePEc archive code, series code, and base URL
  3. Export — Click Full Export to generate all ReDIF files
  4. Verify — Test HTTP access to your archive URL and validate with RePEc
  5. Register — Send your archive URL to the RePEc team for inclusion

That’s it. Your journal is on RePEc.

What Gets Exported?

For each published article, RepecPro generates a complete ReDIF record including:

  • Article title and abstract
  • All author names and affiliations
  • Publication date, volume, issue, and pages
  • Keywords / JEL classification codes
  • DOI (if available)
  • Direct PDF download URL
  • Article landing page URL

Compatibility

Feature OJS 3.3 OJS 3.4
Automatic ReDIF generation
Full / Selective export
Auto-export on publish
Configuration validator
Export history & logging
English / Turkish UI

Get RepecPro

Ready to get your journal indexed on RePEc — the easy way?

Get RepecPro Export Plugin →

REPEC PRO GUIDE

Need help with installation or RePEc registration? Contact us — we’re here to help.


RepecPro is developed and maintained by OJS Services, providing professional OJS solutions for academic publishers worldwide.

The post RepecPro – RePEc Export Plugin for OJS 3.3 & 3.4 first appeared on OPEN JOURNAL SYSTEM SERVICES.

When Your OJS Journals Start Showing Each Other’s Content

March 9th 2026 at 11:17 pm

A real-world debugging story about Memcached key collisions, caching layers, and why the same bug can hide for months — until it doesn’t.

March 2026  ·  OJS-Services.com

If you’re managing multiple OJS journals on the same server, here’s a scenario that might sound familiar: you update the current issue on one journal, and a few minutes later, a completely different journal’s homepage is showing that same issue. Or worse — users are seeing a journal they’ve never heard of, with a ‘View All Issues’ link that goes nowhere.

We ran into exactly this. Multiple OJS 3.3.x installations on a shared hosting environment, all seemingly independent, but quietly contaminating each other’s data through a shared Memcached instance. Here’s what happened, how we tracked it down, and what actually fixed it.


The Setup

We manage a portfolio of academic journals running on Open Journal Systems (OJS). Several of them are hosted on the same server — each with its own subdomain, its own database, its own OJS installation. Completely separate, or so we thought.

The server runs SiteGround’s shared hosting stack. SiteGround offers several caching layers out of the box:

  • NGINX Direct Delivery — static file serving for images, CSS, JS
  • Dynamic Cache — full-page HTML caching
  • Memcached — object-level caching, shared across all sites on the account


That last one is the key detail. Memcached runs as a single shared service at 127.0.0.1:11211 — and every OJS installation on the account was configured to use it.


What We Saw

The first symptom was a PHP Fatal Error appearing on the homepage of one journal:

Fatal error: Call to a member function getPublished() on null

in classes/journal/SectionDAO.inc.php on line 334


The error trace pointed to getByIssueId(18). Except — issue_id 18 didn’t exist in that journal’s database. The highest issue_id was 11.

So where was 18 coming from?

We checked everything: the issues table, publication_settings, journal_settings, url_path fields. Nothing. The database was perfectly correct. The right current issue was set. Yet OJS was trying to load issue 18 on every homepage request.

This is one of those bugs that PHP 8.0 exposed rather than created. On PHP 7.x, calling a method on null returns null and moves on. On PHP 8.0, it throws a Fatal Error. The underlying problem existed before — it just wasn’t visible.


The Cache Trail

After ruling out database issues, we turned to caching. We deleted the entire /cache/ directory. The error came back immediately on the next request. We cleared SiteGround’s Dynamic Cache. Same result — gone for a moment, then back.

Then we tried something almost accidental: switching the journal’s theme in the OJS admin panel. The error disappeared. We switched back to the original theme. It stayed fixed — for a while.

The reason? Switching themes triggers OJS’s internal cache flush, which includes Memcached. The stale data was cleared. But the next time OJS populated the cache, it pulled the wrong data again.

This pointed clearly at Memcached. The object cache was storing the wrong issue_id, and no amount of file cache clearing would touch it.


The Real Problem: Key Collisions

Here’s what was actually happening. OJS builds Memcached cache keys like this (from MemcacheCache.inc.php):

$this->getContext() . ‘:’ . $this->getCacheId() . ‘:’ . $id


For the current issue cache, this produces a key like:

issues:current:1


The 1 at the end is the journal_id. And here’s the problem: every fresh OJS installation assigns journal_id = 1 to the first journal. All three of our affected installations had journal_id = 1.

So Journal A, Journal B, and Journal C were all reading and writing to the exact same Memcached key. When Journal C updated its current issue, that value was written to issues:current:1. When Journal A loaded its homepage, it read that same key — and got Journal C’s data.

There is no site-specific prefix in OJS 3.3.x’s Memcached implementation. If two installations share the same Memcached instance and both have journal_id = 1 (the default), they will silently share cached data.


The Caching Layer Stack

Before we get to the fix, it’s worth stepping back and looking at the full picture. Modern hosting environments — especially managed ones like SiteGround — can have three or four independent caching layers operating simultaneously:

1. OJS Internal Cache (File-based)

OJS writes cache files to its own /cache/ directory. Clearing this is the first thing most people try. It has no effect on Memcached-stored data.

2. OJS Object Cache (Memcached)

Configured in config.inc.php under [cache]. This is where things like current issue data are stored. If you’re using Memcached on a shared hosting account, this cache is shared at the server level across all sites. This was the source of our problem.

3. Server-Level Dynamic Cache (SiteGround SuperCacher)

SiteGround’s Dynamic Cache stores the complete HTML output of pages. It’s fast, but it can serve stale content even after the database or OJS cache is updated. For OJS journals, we recommend disabling this entirely. OJS has its own caching logic; layering a full-page cache on top creates unpredictable behavior.

4. CDN Cache (Cloudflare)

If your journals are proxied through Cloudflare, you have yet another caching layer in front. Depending on your page rules, Cloudflare can cache HTML pages too. In our setup, some domains were behind Cloudflare — which added another variable to the debugging process when things didn’t clear as expected after a fix.

The tricky part with multiple caching layers is that clearing one doesn’t clear the others. You might flush OJS’s file cache, confirm the database is correct, but Cloudflare is still serving a page from three hours ago. Or SiteGround’s Dynamic Cache is returning a stored response generated before your fix. Always clear in the right order: OJS cache first, then server cache, then CDN.

When something looks wrong on an OJS site and you’ve already confirmed the database is correct, the question becomes: which cache layer am I actually looking at right now?


What Didn’t Work

For the record — things we tried that had no effect on the actual collision:

  • Deleting all /cache/ files: Only affects file-based cache, not Memcached
  • Adding memcache_key_prefix to config.inc.php: This option exists in the config template but is not read by MemcacheCache.inc.php in OJS 3.3.x. It does nothing.
  • Clearing Cloudflare cache: Not the source
  • Clearing SiteGround Dynamic Cache: Temporarily removed stale HTML, but Memcached repopulated on the next request
  • Updating the current issue via database: Correct in DB, but immediately overridden by the stale Memcached value


The Fix

The solution was a one-line addition to MemcacheCache.inc.php in each affected installation. In the constructor, before adding the server, we set a site-specific prefix using Memcached’s OPT_PREFIX_KEY option:

$this->connection = new Memcached;

// Add this line:

$this->connection->setOption(Memcached::OPT_PREFIX_KEY, md5(__FILE__) . ‘_’);

$this->connection->addServer($hostname, $port);


The md5(__FILE__) generates a unique hash from the absolute filesystem path of MemcacheCache.inc.php. Since each OJS installation lives in a different directory, the hash is automatically unique per installation — no manual configuration needed.

After applying this to all three affected installations and flushing Memcached from the SiteGround panel, the cross-site contamination stopped completely.

We also added a null guard to SectionDAO.inc.php to prevent the PHP 8.0 Fatal Error in case a stale cache entry ever surfaces again:

$issue = Services::get(‘issue’)->get($issueId);

if (!$issue) return [];  // Don’t crash on invalid/stale issue_id


Why OJS 3.4.x Wasn’t Affected — What the Code Tells Us

The following is based on direct inspection of OJS 3.4.x source files. These are observations and reasoned conclusions, not claims we can fully verify without PKP team confirmation.


We had OJS 3.4.x installations running on the same server, with the same journal_id = 1, using the same Memcached instance — and they weren’t experiencing the collision. We wanted to understand why before writing this up.

Looking at the OJS 3.4.x source, the answer appears to be that the Memcached cache path for issue data has been intentionally disabled. In classes/issue/Repository.php, the getCurrent() function contains this comment:

// TODO: Caching as currently setup never properly caches objects

// and always fires a _cacheMiss()

// if ($useCache) {

//     $cache = $this->dao->_getCache(‘current’);

//     return $cache->get($contextId);

// }


The Memcached code is commented out. In classes/issue/DAO.php, cache flush calls are similarly disabled with TODO notes. This suggests the PKP team was aware of caching problems during the 3.4.x rewrite and chose to disable this code path temporarily, pending a proper fix.

The result is that OJS 3.4.x reads the current issue directly from the database on every request — no Memcached involved, no collision possible. It’s not that the underlying key collision problem was architecturally solved; it’s that the affected cache path simply isn’t executing.

If Memcached is re-enabled in a future OJS 3.4.x version without adding site isolation, the same collision would likely reappear. The OPT_PREFIX_KEY fix should be applied proactively.


Recommendations

If you’re running multiple OJS 3.3.x installations on the same server with Memcached:

  • Apply the MemcacheCache.inc.php prefix fix to every installation sharing the Memcached instance
  • After applying the fix, flush Memcached from your hosting panel to clear any stale cross-site data
  • Disable SiteGround Dynamic Cache for all OJS subdomains — it conflicts with OJS’s own caching
  • If using Cloudflare, bypass cache for dynamic paths (/index.php/*) and only cache static assets
  • When troubleshooting: clear OJS cache first, then server cache, then CDN — in that order


For CMS and publishing platforms with their own internal caches, server-level full-page caching (Dynamic Cache, Varnish, etc.) often causes more problems than it solves. Leave object caching to the application; use the CDN for static assets.


Wrapping Up

Cache bugs are among the most disorienting to debug because the evidence keeps disappearing. The database looks right, the admin panel looks right, but the site is showing something wrong. When you’re dealing with a multi-layer cache stack and multiple installations sharing infrastructure, the number of possible interactions multiplies fast.

In our case, the bug had probably been present for months, quietly hiding behind PHP 7.x’s silent null handling. The PHP 8.0 upgrade made it impossible to ignore. Sometimes an upgrade doesn’t introduce bugs — it just makes existing ones visible.

We’ve submitted a detailed bug report to the PKP/OJS team with the full analysis and reproduction steps. If you’re running a similar multi-site OJS setup and seeing strange homepage behavior, Memcached key collisions should be high on your list of suspects.


OJS-Services.com

We manage 500+ academic journals on Open Journal Systems. When we run into edge cases like this, we write them up — because someone else is probably dealing with the same thing.

The post When Your OJS Journals Start Showing Each Other’s Content first appeared on OPEN JOURNAL SYSTEM SERVICES.

Country Statistics for OJS (Authors and Articles by Country)

March 4th 2026 at 12:43 am

Introducing Country Statistics: Track the Geographic Reach of Your OJS Journal

Prove your journal’s international diversity to indexing bodies — with one plugin.


When applying to Web of Science, Scopus, DOAJ, or other prestigious indexes, there is one question that almost every journal faces:
How geographically diverse is your author base? Indexing committees look for evidence that a journal attracts contributors from a wide range of countries.
It signals international relevance, editorial quality, and scholarly impact beyond regional boundaries.

Until now, answering that question in OJS meant manually combing through submission records, building spreadsheets, and hoping you did not miss anyone.
We built Country Statistics to eliminate that entire process.

What Does Country Statistics Do?

Country Statistics is a free, open-source analytics plugin for OJS 3.3 that automatically analyzes your published submissions and shows you exactly where your authors come from —
visualized through interactive charts, detailed tables, and exportable data.

Once installed, a new Country Statistics menu item appears in the OJS management sidebar. Click it, and you are greeted with a full analytics dashboard:

Admin Dashboard — summary cards, bar chart, donut chart, and data tables

The dashboard provides four key metrics at a glance:

  • Published Articles — total number of published articles in the journal
  • Unique Authors — deduplicated author count across all publications
  • Countries — number of distinct countries represented
  • Top Country Share — the percentage held by the leading contributor country

Below the summary cards, a horizontal bar chart displays the top 12 contributing countries, while a donut chart breaks down the proportional author distribution.
Both update in real time as you change filters.

Smart Author Deduplication

A common challenge in author-country analysis is counting: if the same researcher has published five articles, should they count as five authors or one?
Country Statistics handles this with a configurable deduplication engine.

You choose the identification strategy:

  • ORCID — the gold standard for unique researcher identification
  • Email — useful when ORCID data is sparse
  • Full Name — a simple fallback for legacy data

When ORCID is selected, you can also define a fallback chain for authors who lack an ORCID — for example, try email first, then full name.
This ensures the most accurate count possible regardless of your journal’s metadata completeness.

Plugin Settings — deduplication strategy, display format, public page options

Two Tabs, Two Perspectives

The data tables are organized under two tabs:

Authors by Country — shows how many unique authors come from each country, with percentage share and a visual distribution bar. This is the metric most indexing bodies care about.

Articles by Country — shows how many published articles are associated with each country (an article with authors from three countries counts once for each). This gives you the publication volume perspective.

Both tables are fully searchable. Type a country name, and the table filters instantly. Need the data outside OJS?
Hit the CSV button to export everything — UTF-8 encoded and ready for your spreadsheet or index application form.

A Public Page for Transparency

Beyond the admin dashboard, Country Statistics offers an optional public-facing statistics page.
When enabled, this page displays the same charts and tables (without admin controls) to anyone visiting your journal’s website.

Public Page — charts and tables visible to site visitors

Why make this data public? Because transparency builds trust. Prospective authors can see that your journal has genuine international reach.
Indexing committees can verify your claims directly. Readers can appreciate the diversity behind the research they are consuming.

The public page title is fully customizable — call it “International Reach,” “Global Contributors,” “Geographic Distribution,” or whatever suits your journal’s tone.
You can add it to any navigation menu through OJS’s built-in Navigation Menu system with a dedicated menu item type.

Flexible Filtering for Admins

The admin dashboard goes further with real-time filters:

  • Time Range — view all-time data, or limit to the last 12 or 24 months
  • Unique Strategy — switch between ORCID, email, or name-based counting on the fly to compare results
  • Minimum Threshold — hide countries with fewer than N authors or articles to reduce noise

These filters let you generate exactly the dataset you need for different reports or application forms.

Why We Built It This Way

We deliberately designed Country Statistics with zero external dependencies. There are no CDN-hosted chart libraries, no API calls to third-party services, no npm packages to maintain.
Every chart is rendered using pure SVG. Every interaction runs on vanilla JavaScript.

This means:

  • Fast load times — nothing to fetch from external servers
  • No privacy concerns — no data leaves your server
  • No maintenance burden — no library updates to track or security patches to worry about
  • Broad compatibility — works in any modern browser without polyfills

The plugin also ships with English and Turkish translations, and adding more languages is straightforward through standard .po locale files.

Installation in Under a Minute

  1. Download the latest .tar.gz from the GitHub releases page
  2. In OJS, go to Settings → Website → Plugins → Upload A New Plugin
  3. Upload the file and enable it under Generic Plugins

That is it. No database migrations, no configuration files to edit, no server dependencies to install.
The plugin reads your existing submission metadata and starts working immediately.

If you use our Bulk Plugin Manager, Country Statistics is automatically detected and can be installed
or updated directly from the plugin management interface.

Who Is This For?

  • Journal Managers preparing index applications (Web of Science, Scopus, DOAJ) who need geographic diversity data
  • Editors-in-Chief evaluating their journal’s international reach and identifying underrepresented regions
  • Editorial Boards building strategic outreach plans based on contributor geography
  • University Press Teams reporting publishing metrics to institutional stakeholders

If your journal publishes research and you care about where your authors come from, this plugin gives you the answer in seconds.

Open Source and Free

Country Statistics is released under the GNU General Public License v3.0. It is completely free to use, modify, and distribute.
The source code is available on GitHub.


Have questions, found a bug, or want to request a feature? Open an issue on
GitHub
or reach out at info@ojs-services.com.

We build tools that make OJS better for everyone. Stay tuned for more.

— OJS Services Team

The post Country Statistics for OJS (Authors and Articles by Country) first appeared on OPEN JOURNAL SYSTEM SERVICES.

Review Certificate Pro: Professional Reviewer Certificates for OJS 3.3 & 3.4

February 16th 2026 at 11:42 pm

Generate professional, verifiable PDF certificates for peer reviewers directly from your OJS dashboard. Multilingual support, QR verification, bulk operations, and more.

Every Reviewer Deserves Recognition

Peer review is the backbone of academic publishing. Reviewers dedicate hours of their expertise — yet most journals offer little more than a thank-you email in return.

What if you could hand every reviewer a professionally designed, verifiable certificate — without leaving your OJS dashboard?

That’s exactly what Review Certificate Pro does. See Certificate Templates


What Is Review Certificate Pro?

Review Certificate Pro is a premium plugin for Open Journal Systems (OJS) 3.3 and 3.4 that automates the entire reviewer certification workflow. Generate multilingual PDF certificates, verify them with QR codes, track downloads, send notification emails — all from a centralized management interface integrated directly into your OJS backend.

No external tools. No manual PDF editing. No spreadsheets.

Screenshot of the management dashboard showing the certificate list with filters, bulk toolbar, and action buttons


Key Features at a Glance

Professionally Designed PDF Certificates

Each certificate is generated as a high-quality A4 landscape PDF with:

  • Triple border frame with gold corner ornaments
  • Journal logo and ISSN/e-ISSN
  • Reviewer’s full name and article title
  • Editor-in-Chief and Managing Editor signatures
  • Unique verification code
  • QR code for instant verification

Sample certificate PDF showing the full design with borders, signatures, QR code, and verification code


Multilingual — Not Just English

The plugin generates a separate PDF for each active language in your journal. If your OJS runs Turkish and English, every reviewer gets both versions with a single click.

Want to add Russian, Arabic, Spanish, or any other language? Just create a locale folder — the plugin detects it automatically.

QR Code Verification

Every certificate carries a unique verification code and a scannable QR code. Anyone — reviewers, institutions, funding agencies — can verify a certificate’s authenticity instantly.

The public verification page supports two flows:

  • QR scan / direct link: Instant results, no challenge required
  • Manual code entry: Protected by a math-based anti-bot challenge

Verification page showing a successful verification result with certificate details


Centralized Management Dashboard

Forget navigating submission by submission. The management dashboard lists every review assignment across your entire journal in one place.

  • Filter by issue, by status, or search by reviewer name
  • See at a glance: who has a certificate, who has been notified, who has downloaded
  • Direct links to each submission’s workflow page
  • Pagination for journals with thousands of reviews


Bulk Operations

Select multiple reviewers and:

  • Bulk Generate: Create certificates for all selected eligible reviews
  • Bulk Notify: Send notification emails to all selected reviewers who haven’t been notified yet

A progress indicator keeps you informed: (3/12)...

Perfect for journals that want to issue certificates retroactively for past volumes.

Email Notifications with Preview

Customize the notification email template with placeholders like {reviewerName}{articleTitle}{journalName}, and {verificationCode}.

Before sending, click the preview button to see exactly what the reviewer will receive. If it looks right, send it directly from the preview modal.

Email preview modal showing the populated email with To, Subject, and Body fields

Download Tracking

Know whether a reviewer has actually downloaded their certificate. Download counts are displayed in both the workflow tab and the management dashboard — so you can follow up with reviewers who haven’t collected theirs.

Reviewer Self-Service

Reviewers don’t need to contact the editorial office. Once a certificate is generated, download buttons appear automatically on:

  • The reviewer’s completed review page
  • The reviewer’s submissions list

They can download their certificate in any available language, at any time.

Retroactive Support

Already published 50 issues before installing the plugin? No problem. Review Certificate Pro reads from the existing OJS review_assignments table. Any completed review for a published article is eligible — regardless of when it was completed.


How It Works

  1. Install the plugin via OJS Settings > Website > Plugins
  2. Configure your Editor-in-Chief name, optional Managing Editor, and email template
  3. Generate certificates from the workflow tab or the management dashboard
  4. Preview and send notification emails to reviewers
  5. Reviewers download their certificates from their OJS account

That’s it. Five steps from installation to happy reviewers.


Built for Security

  • CSRF protection on all actions
  • Role-based authorization (Site Admin, Journal Manager, Sub-Editor)
  • Parameterized database queries — no SQL injection
  • HMAC-signed verification tokens with expiry
  • PDF files stored outside the web root
  • Certificate context isolation per journal

What’s Included with Your Purchase

Lifetime license Single OJS installation, no recurring fees
All future updates New features and compatibility updates included
Installation support We help you install and configure the plugin
Priority email support Technical issues resolved promptly
Customization guidance Advice on adapting the plugin to your journal’s needs

Requirements

  • OJS 3.3.0.x and 3.4.x
  • PHP 7.4 or 8.1+
  • TCPDF library (included with the plugin — no extra setup)

Get Review Certificate Pro

Ready to give your reviewers the recognition they deserve?

$99 — Lifetime License

One payment. Lifetime updates. Full support.


Looking for more OJS plugins? Check out our full plugin catalog.

The post Review Certificate Pro: Professional Reviewer Certificates for OJS 3.3 & 3.4 first appeared on OPEN JOURNAL SYSTEM SERVICES.

Why Your Journal Should Be on RePEc (And How to Get There)

February 15th 2026 at 12:07 pm

If you’re running an academic journal in economics, finance, business, or any related social science field, there’s one platform you simply can’t afford to ignore: RePEc — Research Papers in Economics.

But here’s the thing most editors and publishers don’t realize: RePEc isn’t just another database. It’s a massive, volunteer-driven ecosystem that can dramatically boost your journal’s visibility, your authors’ profiles, and your publication’s credibility. And the best part? It’s completely free.

Let’s break down what RePEc is, why it matters for your journal, and how you can get started — especially if you’re running your journal on Open Journal Systems (OJS).

So, What Exactly Is RePEc?

RePEc is a decentralized, open initiative that enhances the dissemination of research in economics and related disciplines. Founded in 1997, it has grown into one of the largest open bibliographic databases in the social sciences.

The numbers speak for themselves: over 2,350 archives from 104 countries have contributed roughly 5 million research items from more than 4,200 journals and 5,600 working paper series. Over 70,000 authors have registered, and 75,000 email subscriptions are served every week.

Unlike traditional indexing services, RePEc works on a beautifully simple model. Publishers place structured metadata files on their own servers, following a standardized format called ReDIF (Research Documents Information Format). RePEc’s system then mirrors and distributes this data across its network of services.

Why Should You Care as a Journal Editor or Publisher?

Here’s where it gets interesting. Being listed on RePEc doesn’t just mean your articles sit in yet another database. It means your content flows into an entire ecosystem of services, each one amplifying your journal’s reach.

Visibility Across Multiple Platforms

When your journal is indexed in RePEc, your articles automatically become discoverable through a wide range of services and platforms. This isn’t just one website — it’s an entire network:

Core RePEc Services:

  • IDEAS — The largest open bibliographic database in economics. Your articles become fully searchable and browsable here, complete with author profiles, citations, and download statistics.
  • EconPapers — Another major gateway to the full RePEc database, offering search and browsing with a different interface and user base.
  • CitEc — Citation analysis for all items in the RePEc database. Your articles get tracked for citations, building a measurable impact trail.
  • NEP (New Economics Papers) — A free email, RSS, and Twitter/X notification service covering over 90 specific fields. When you publish a new working paper, researchers in relevant fields get notified automatically.
  • LogEc — Detailed download and access statistics for your items and authors. You get real data on how your content is being consumed.
  • CollEc — Co-authorship centrality rankings for registered authors.
  • RePEc Biblio — A hand-selected bibliography of important articles and papers in economics.
  • EDIRC — A directory of economics institutions, linking members to their publications on RePEc.
  • RePEc Genealogy — An academic family tree for economics.
  • EconAcademics.org — A blog aggregator for discussion about economics research.
  • RePEc Author Service — Where authors register and maintain their profiles, linking their work across the entire system.
  • MPRA (Munich Personal RePEc Archive) — Authors at institutions without a participating RePEc archive can submit papers here.

Third-Party Platforms Using RePEc Data:

But the reach doesn’t stop at RePEc’s own services. Because RePEc bibliographic data is in the public domain, your content also feeds into:

  • Google Scholar — The go-to search engine for academics worldwide.
  • EconLit — The American Economic Association’s premier database.
  • EconStor — A digital publication server for open-access economics literature.
  • OpenAIRE — The European open science infrastructure.
  • ResearchGate — A massive social networking site for researchers.
  • EBSCO — A leading research database provider.
  • OpenAlex — An open catalog of the world’s scholarly works.
  • OAISter/WORLDCAT — OCLC’s union catalog of digital resources.
  • Microsoft Academic Search and Sciverse — Additional academic search platforms.

That’s a lot of exposure from a single indexing effort.

Author Engagement and Retention

Authors care about where their work is visible. When your journal is on RePEc, your authors can link their publications to their RePEc Author Service profiles, track citations through CitEc, monitor download statistics via LogEc, and receive notifications about new citations. This kind of author engagement is gold for journal editors trying to attract and retain quality submissions.

Rankings and Impact Metrics

RePEc maintains its own ranking system based on various criteria — citations, downloads, and more. Being part of this system gives your journal and its authors measurable, transparent impact metrics that complement traditional measures like Impact Factor.

It’s Free — Seriously

Unlike many indexing services that charge hefty fees, RePEc is entirely volunteer-driven and free for all parties. No submission fees, no listing fees, no annual charges. It’s sustained by a global community of volunteers who believe in open access to research.

Is It Only for Economics?

This is a common misconception. While RePEc started with — and is strongest in — economics, it welcomes related disciplines as well. If your journal publishes research in:

  • Finance and banking
  • Business and management
  • Public policy
  • Agricultural economics
  • Environmental economics
  • Health economics
  • Political economy
  • Econometrics and statistics
  • Development studies
  • International trade
  • Urban and regional economics
  • Law and economics

…then you absolutely belong on RePEc. The key criterion is that your content should be relevant to the economics research community in some way. Many interdisciplinary journals are already on RePEc, and the platform actively encourages related fields to participate.

If you’re unsure whether your journal qualifies, the best approach is to review the existing archives and see if journals similar to yours are already listed — chances are, they are.

How to Get Your Journal on RePEc

The process of joining RePEc involves creating a “RePEc archive” on your server. Here’s the general workflow:

  1. Register as a provider — You’ll need to set up an archive with a unique identifier.
  2. Create metadata files — These are structured text files (using ReDIF syntax) that describe your journal, its issues, and individual articles.
  3. Host them on your server — The files need to be accessible via HTTP, HTTPS, or FTP.
  4. RePEc mirrors your data — Once everything is set up, RePEc’s system automatically picks up and distributes your metadata.

The technical requirements follow the Guildford Protocol and use the ReDIF (Research Documents Information Format) specification. While the format is straightforward, it does require attention to detail — correct template types, proper field formatting, and a specific directory structure.

OJS Users: There’s an Easier Way

If you’re running your journal on Open Journal Systems (OJS), you know that managing technical integrations can be a headache. Setting up RePEc metadata manually — creating ReDIF templates, maintaining directory structures, generating index files — is doable, but it’s tedious and error-prone.

That’s exactly why we built the RePEc Pro Export Plugin for OJS.

Our plugin automates the entire RePEc integration for OJS-based journals. Instead of manually creating and maintaining ReDIF files, the plugin handles everything:

  • Automatic ReDIF template generation for your journal articles
  • Proper directory structure creation and management
  • Index files that are HTTP-accessible for RePEc’s crawler
  • Metadata mapping from your OJS article data to RePEc’s required fields
  • Ongoing synchronization — when you publish new issues, the metadata is automatically updated

No need to learn ReDIF syntax, no manual file management, no worrying about whether your templates are properly formatted. Install the plugin, configure your RePEc archive details, and you’re ready to go.

Get the RePEc Pro Export Plugin →

The Bottom Line

In academic publishing, visibility is everything. RePEc offers a proven, trusted, and completely free pathway to get your journal’s content in front of the researchers who need it most. With automatic distribution across platforms like IDEAS, EconPapers, Google Scholar, and many more, a single integration effort yields returns across the entire academic discovery ecosystem.

For OJS users, our RePEc Pro Export Plugin makes the technical side effortless, so you can focus on what matters: publishing great research.

Your authors are already looking for their work on RePEc. Make sure they can find your journal there too.


This post is brought to you by OJS Services, helping academic journals thrive with professional OJS solutions.

The post Why Your Journal Should Be on RePEc (And How to Get There) first appeared on OPEN JOURNAL SYSTEM SERVICES.

Email Settings Plugin for OJS

February 9th 2026 at 7:18 pm

Manage OJS Email Settings from the Admin Panel: Email Settings Plugin

One of the most common issues OJS users face: email delivery.

In forums, support requests, and the OJS community, the most frequently asked questions are always the same:

  • “My journal isn’t sending emails, what should I do?”
  • “How do I configure Gmail SMTP?”
  • “I can’t edit config.inc.php, I don’t have server access”
  • “Can we set up different email addresses for each journal?”

We developed the Email Settings Plugin to solve these problems and make life easier for OJS administrators.


❌ The Old Way: Complex and Technical

To change email settings in OJS, you needed to:

  1. Connect to the server via FTP/SSH
  2. Find and edit the config.inc.php file
  3. Write SMTP parameters in the correct format
  4. Risk breaking your site if you make a mistake
  5. Repeat this process for every change

Result: A nearly impossible process for journal editors and managers without technical knowledge.


✅ The New Way: Easy Management from the Panel

With Email Settings Plugin:

  • No server access required — All settings are configured from the OJS admin panel
  • Visual interface — No complex configuration files, just form fields
  • Instant changes — Click Save, and it’s immediately active
  • Secure — Passwords are stored encrypted

🌟 Key Features

📧 Popular Service Presets

Ready-made settings for Gmail, Yandex, Office 365, and Zoho Mail. Just enter your email and password, and the plugin handles the rest.

Important notes like Gmail’s App Password requirement are automatically displayed.

🏢 Multi-Journal Support

This feature was requested by many publishers.

If you manage multiple journals in a single OJS installation, you can set different SMTP configurations for each:

  • Journal A → info@journala.com (Gmail)
  • Journal B → editor@journalb.com (Yandex)
  • Journal C → contact@journalc.com (Corporate SMTP)

Each journal sends emails from its own address.

📊 Simple Statistics

Track sent emails:

  • How many emails sent today
  • How many emails sent in the last 7 days
  • How many emails sent in the last 30 days

This lets you easily see if your email system is working.

✉️ Test Email

Send a test email immediately after saving your settings. See any issues instantly and fix them.

🔒 Security

  • CSRF protection
  • Passwords encrypted with AES-256
  • Only Site Admin and Journal Manager can access (Journal Editors cannot)

📬 Deliverability Recommendations

Information about SPF, DKIM, and DMARC. Guidance on DNS settings to prevent your emails from landing in spam folders.

Settings Page — Status & Configuration


Settings Page

SMTP Configuration & Service Presets


SMTP Configuration

Gmail Preset with App Password Notice


Gmail Preset

Yandex Mail Preset


Yandex Preset

Test Email & Deliverability Recommendations


Test Email


📥 Installation

  1. Download the .tar.gz file from GitHub Releases
  2. Go to OJS → Settings → Website → Plugins → Upload A New Plugin
  3. Enable the plugin
  4. Click the “Email Settings” link in the sidebar or access plugin settings

🆓 Free and Open Source

This plugin is provided free of charge under the GPL v3 license. We developed it as our contribution to the OJS community.

For installation support, customization, or OJS consulting: ojs-services.com


📎 Links


Made with ❤️ by OJS Services — Professional OJS hosting, themes, plugins and consulting for academic journals.

The post Email Settings Plugin for OJS first appeared on OPEN JOURNAL SYSTEM SERVICES.

ORCID iD and Phone Number at Registration: Plugin for OJS 3.3

February 9th 2026 at 4:12 am

If you manage an academic journal on OJS, you already know the problem: a new author registers, submits a manuscript — and then you realize their ORCID iD and phone number are missing from their profile. You send an email asking them to update their profile, wait for a response, and sometimes follow up again. This small gap in the registration workflow costs time for everyone involved.

Registration Fields is an open-source OJS plugin that closes this gap by adding ORCID iD and Phone Number fields directly to the user registration form.

The Problem

OJS stores both ORCID iD and phone number in user profiles. These fields exist in the system and are used by DOI registration, Crossref deposits, and editorial communication. However, OJS only allows users to fill in these fields after registration, through the profile editor. There is no built-in way to ask for this information during signup.

For journals that require ORCID iDs — an increasingly common policy — this creates an unnecessary extra step. Authors register, then must be reminded to go back and add their ORCID. For editorial offices that need phone numbers for communication, the same problem applies.

What the Plugin Does

The Registration Fields plugin adds two optional fields to the OJS registration form, positioned between the profile section and the login credentials section:

ORCID iD and Phone Number fields appear on the registration form, above the Login section.

Each field can be independently enabled or disabled, and each can be set as required or optional. The configuration is done through a simple settings panel accessible from the plugin management page:

The settings panel lets you enable, require, or disable each field independently. A debug mode is available for troubleshooting.

Values entered during registration are saved directly to the corresponding OJS profile fields — the same fields used by ORCID integrations, Crossref, and the editorial contact system. No new database tables are created; the plugin simply writes to what is already there.

Key Features

ORCID iD validation accepts three common input formats — bare identifier (0000-0000-0000-0000), full HTTPS URL, or HTTP URL — and normalizes all of them to the standard https://orcid.org/ format on save.

Phone number validation accepts international formats with country codes, supporting digits, spaces, plus signs, dashes, and parentheses.

Theme compatibility is handled through flexible pattern matching with a built-in fallback mechanism. The plugin works across OJS themes including Default, Manuscript, Bootstrap3, Health Sciences, JournalPlus, NIVO, and AXIS. If a theme uses an unusual HTML structure, the fields are still rendered before the form’s closing tag.

Debug mode can be enabled from the settings panel to write diagnostic information to the PHP error log. This helps identify exactly how the plugin is interacting with a particular theme, making it easy to troubleshoot without modifying any code.

Who Is This For?

  • Journals requiring ORCID iDs at submission — Collect them upfront instead of chasing authors after registration.
  • Editorial offices that communicate by phone — Have the number from day one.
  • Journal managers who want cleaner author profiles — Reduce incomplete registrations without adding manual follow-up steps.

Technical Details

The plugin integrates with OJS through its hook system — no core files are modified. It uses output filtering to inject fields into the registration form, server-side validation for all inputs, and a deferred save mechanism to ensure data is written after the user record is created. All input is sanitized and escaped, and the plugin includes CSRF protection for its settings form.

It is compatible with OJS 3.3.0.0 through 3.3.0.22 and PHP 7.4 through 8.2.

Installation

  1. Download the latest release from GitHub.
  2. In OJS, go to Settings → Website → Plugins → Upload a New Plugin.
  3. Upload the .tar.gz file and enable the plugin.
  4. Click Settings to configure which fields appear on the registration form.

The plugin is free, open-source (GPL v3), and available in English and Turkish.


Developed by OJS Services.

The post ORCID iD and Phone Number at Registration: Plugin for OJS 3.3 first appeared on OPEN JOURNAL SYSTEM SERVICES.

Login with Email Address in OJS: Email Login Plugin

January 30th 2026 at 1:06 pm

We frequently hear this complaint from journal managers using OJS: “Our users keep requesting password resets, but they haven’t actually forgotten their passwords!”

The root cause is simple: OJS requires a username to login. However, almost every website today allows login with an email address. Users naturally enter their email address in OJS and receive the “Invalid username or password” error.

This results in:

  • 📧 Unnecessary password reset requests
  • 😤 User frustration
  • ⏰ Wasted time for journal managers

The Solution: Email Login Plugin

We developed the Email Login Plugin to solve this problem. With this plugin, users can now login using either their username or email address.

How It Works

  1. User enters their email address in the login field
  2. The plugin automatically finds the username associated with that email
  3. Login proceeds normally

The user doesn’t notice any difference – they can simply login with their email address now!

Features

Email login – Users can now login with their email address
Username support – Existing behavior unchanged, username login still works
Automatic form update – Login form label changes to “Username or Email”
Secure – SQL injection protection and input validation
No core modifications – No issues with OJS updates
Bilingual support – English and Turkish


Installation

Installation takes just a few minutes:

  1. Download the .tar.gz file from GitHub releases
  2. Go to Settings → Website → Plugins in OJS admin panel
  3. Click Upload A New Plugin
  4. Select the downloaded file
  5. Enable “Email Login” under Generic Plugins

That’s it! Your users can now login with their email addresses.


Compatibility

Requirement Version
OJS 3.3.0 – 3.3.0.22+
PHP 7.3 or higher

Security

Security was a priority during development:

  • Prepared Statements protect against SQL injection attacks
  • Email addresses are validated and sanitized before database queries
  • Disabled accounts cannot login via email
  • Error messages don’t reveal whether an email exists in the system

Frequently Asked Questions

Q: Will existing username login continue to work?
A: Yes, nothing changes. Users can login with either username or email.

Q: Will the plugin break when I update OJS?
A: No, the plugin doesn’t modify core files. It’s unaffected by OJS updates.

Q: What happens if the same email is used for multiple accounts?
A: OJS already prevents the same email from being used for multiple accounts.


Download

📥 Download Email Login Plugin v1.1.0

📖 GitHub Repository


Support

For questions or issues with the plugin:

The post Login with Email Address in OJS: Email Login Plugin first appeared on OPEN JOURNAL SYSTEM SERVICES.

Volume, Issue, Page Numbers, and Elocation-ID in Academic Journals

January 20th 2026 at 2:40 am

If you’re setting up an academic journal or managing one through OJS, you’ve probably wondered: Should I use traditional page numbers or switch to article numbers? Do I really need both volume and issue? What do PubMed and Scopus actually require?

These questions matter more than you might think. The wrong choice can cause indexing problems, citation errors, and headaches down the road. This guide breaks down everything you need to know about article numbering systems, helps you choose the right model for your journal, and shows you how to configure it properly in OJS.


Understanding the Basics

Before diving into the details, let’s clarify what each term means:

Volume

A volume is the highest-level grouping of articles, typically corresponding to one calendar year. Some high-output journals publish multiple volumes per year, but one volume per year is standard.

Example: Journal of Chemistry, Volume 48 (2024)

Issue

An issue is a subdivision within a volume. Depending on publication frequency, a journal might have 2, 4, 6, 12, or more issues per year.

Example: Volume 48, Issue 3 (May-June 2024)

Page Numbers (fpage/lpage)

Page numbers indicate where an article begins and ends:

  • fpage (First Page): The starting page
  • lpage (Last Page): The ending page

Example: Pages 245-260

In traditional journals, page numbers run continuously throughout a volume. So Issue 1 might be pages 1-150, Issue 2 would be 151-300, and so on.

Elocation-ID (Article Number)

An elocation-id (electronic location identifier) is a unique article identifier that replaces physical page numbers in digital publishing. Think of it as a permanent address for your article that doesn’t depend on where it sits in a printed issue.

Common formats:

  • e12345 (PLOS, eLife style)
  • 2024.01.15.576123 (preprint style)
  • 100234 (simple numeric)
  • eabc1234 (Science Advances style)

The elocation-id is essential for continuous publishing, where articles are published as soon as they’re ready rather than waiting for an issue to be compiled.


How Academic Publishing Has Changed

The Print Era (1665-1990s)

For over 300 years, academic publishing followed the same basic model:

  • Articles were collected into “issues” at regular intervals
  • Issues were printed and mailed to subscribers
  • Page numbers ran sequentially through each volume
  • At year’s end, issues were bound into volumes

The volume + issue + page number combination uniquely identified every article.

The Digital Transition (1990s-2010s)

When journals moved online, they initially just created digital copies of print issues:

  • PDFs replicated the print version exactly
  • Page numbers were preserved in digital format
  • Issues were still published as complete units

Modern Digital Publishing (2010s-Present)

The last decade has fundamentally transformed how journals operate:

Continuous Publishing: Articles are published immediately upon acceptance, without waiting for an issue. This is crucial in fast-moving fields like medicine and biology where timely dissemination can impact patient care.

Online-First / Ahead of Print: Articles appear online before being assigned to an issue.

HTML and XML-First Workflows: Instead of PDF-centric production, modern journals produce structured, searchable, accessible content. JATS XML has become the standard format for scholarly articles.


Four Publishing Models Compared

Model 1: Traditional (Volume + Issue + Pages)

Aspect Details
Structure Volume → Issue → Article (page range)
Example Vol. 48, No. 3, pp. 245-260
Citation format Journal Name, 48(3), 245-260
Pros Universally recognized, compatible with all indexes
Cons Publication delays, must wait for issue completion
Best for Social sciences, humanities, lower-volume journals

Model 2: Volume + Elocation-ID (No Issues)

Aspect Details
Structure Volume → Article (elocation-id)
Example Vol. 2024, e12345
Citation format Journal Name, 2024, e12345
Pros Fast publication, continuous publishing ready
Cons Some legacy systems may not handle it well
Best for High-volume journals, PLOS/eLife style publications

Model 3: Issue Only + Pages

Aspect Details
Structure Issue → Article (page range)
Example Issue 45, pp. 1-15
Citation format Journal Name, (45), 1-15
Pros Simple structure, good for regular publications
Cons Harder to group by year
Best for Newsletters, irregular publications

Model 4: Continuous Publishing

Aspect Details
Structure Year/Volume → Article (elocation-id + publication date)
Example 2024;e2024001 (published January 15, 2024)
Citation format Journal Name, 2024, e2024001. https://doi.org/…
Pros Minimum delay, each article independent
Cons Requires workflow changes, new citation habits
Best for Medicine, biology, rapidly evolving fields

What Each Index Actually Requires

This is where it gets practical. Different indexes have different requirements, and getting this wrong can cause real problems.

Requirements Comparison Table

Field PubMed PMC Crossref Scopus Web of Science DOAJ
Volume Required Required* Recommended Strongly recommended Strongly recommended Optional
Issue Optional Optional Optional Optional Optional Optional
fpage/lpage fpage OR elocation required fpage OR elocation required Recommended Strongly recommended Strongly recommended Optional
Elocation-ID Required if no fpage Required if no fpage Accepted Accepted Accepted Accepted
DOI Strongly recommended Strongly recommended REQUIRED Strongly recommended Strongly recommended Strongly recommended
ORCID Recommended Recommended Recommended Recommended Recommended Recommended

*For continuous publishing in PMC, year can substitute for volume.

Critical Rules You Must Know

PubMed and PubMed Central (PMC)

PubMed is the world’s largest biomedical literature database. Their requirements are clear:

Golden Rule: Either fpage (first page) OR elocation-id MUST be present. Articles without one or the other will be rejected.

✅ Valid: Volume: 48, Issue: 3, fpage: 245, lpage: 260
✅ Valid: Volume: 2024, elocation-id: e12345
❌ Invalid: Volume: 48, Issue: 3 (no page or elocation!)

Crossref

Crossref manages the DOI system. For DOI registration:

Golden Rule: DOI is mandatory. Other metadata fields are optional but highly recommended—the richer your metadata, the better citation linking works.

Scopus and Web of Science

These selective indexes consider metadata quality when evaluating journals:

  • Consistent metadata structure across all articles
  • Complete author information and affiliations
  • Proper date formatting
  • Structured reference lists

Important: Metadata inconsistencies (some articles have volume, others don’t) can be grounds for rejection when applying for indexing!


Which Model Should You Choose?

Decision Tree

How many articles does your journal publish per year?
│
├─► 50+ articles/year
│   │
│   └─► Consider Continuous Publishing + Elocation-ID
│       (Articles published as soon as ready)
│
├─► 20-50 articles/year
│   │
│   ├─► Can you maintain a regular issue schedule?
│   │   │
│   │   ├─► Yes → Traditional (Volume + Issue + Pages)
│   │   │
│   │   └─► No → Volume + Elocation-ID (no issues)
│
└─► Fewer than 20 articles/year
    │
    └─► Traditional model or issue-only model

Recommendations by Discipline

Field Recommended Model Reasoning
Medicine & Health Sciences Continuous Publishing Research results can save lives; speed matters
Basic Sciences (Physics, Chemistry, Biology) Volume + Elocation-ID High volume, need for fast publication
Engineering Traditional or Volume + Elocation-ID Varies by subfield
Social Sciences Traditional Slower pace, themed issues common
Humanities Traditional Traditional citation culture, monographic approach
Law Traditional Page numbers critical for legal citations
Interdisciplinary Volume + Elocation-ID Provides flexibility

Switching from One Model to Another

Already publishing with one model and want to change? It’s possible, but requires careful planning.

Switching from Page Numbers to Elocation-ID

When to switch:

  • Publication volume is increasing
  • Issue compilation is creating bottlenecks
  • Authors complain about publication delays

How to switch:

  1. Clean break: Start using elocation-id from a specific volume/year
    • Example: “Starting with Volume 49 (2025), articles will use article numbers instead of page numbers”
  2. Gradual transition: Assign elocation-id for online-first, then add page numbers when compiling issues

What to do:

  • Notify all indexes in advance
  • Update your website with an explanation
  • Preserve archive records

Switching from Volume + Issue to Volume Only

This transition is relatively straightforward:

  1. Publish your final issue and announce: “Future articles will be published continuously without issue numbers”
  2. Define your elocation-id format (e.g., e2025001, e2025002…)
  3. Update your metadata templates

Switching to Continuous Publishing

This is the most comprehensive change, requiring:

Technical infrastructure:

  • Per-article DOI registration (not batch)
  • Online-first publication system
  • HTML/XML-first workflow

Process changes:

  • Each article finalized independently
  • No page layout or issue compilation
  • Publication date = acceptance + production time (typically 1-4 weeks)

Index notifications:

  • Formal notification to PubMed, Scopus, WoS
  • Updated Crossref metadata structure

Transition Checklist

  • [ ] Does the ISSN need updating? (Usually no)
  • [ ] Website citation guide updated?
  • [ ] Authors informed of new citation format?
  • [ ] Indexes formally notified?
  • [ ] OJS settings updated?
  • [ ] DOI registration templates updated?

OJS Configuration Guide

If you’re using Open Journal Systems, here’s how to configure each model:

Traditional Model Setup

  1. Go to Settings → Journal → Masthead
  2. Configure your publication schedule
  3. For each issue, go to Issues → Create Issue:
    • Set Volume number
    • Set Issue number
    • Pages will be assigned per article
  4. When adding/editing articles, enter:
    • Pages: e.g., “245-260”

Elocation-ID Setup (OJS 3.3+)

  1. Go to Settings → Workflow → Submission → Metadata
  2. Enable the “Pages” field (this can hold elocation-id)
  3. For articles, enter the elocation-id in the Pages field:
    • Pages: e12345
  4. In your citation style, ensure elocation-id displays correctly

Continuous Publishing Setup

  1. Create a single “issue” for the entire year:
    • Volume: 2025
    • Issue: Leave blank or use “1”
    • Year: 2025
  2. Publish articles directly to this “issue” as they’re ready
  3. Use elocation-id for each article
  4. The publication date will be recorded individually per article

Need help configuring OJS? At ojs-services.com, we help journals set up and configure OJS for any publishing model. Whether you need installation, migration, or ongoing support, we’re here to help your journal succeed.


JATS XML Examples

For those producing JATS XML (required for PMC and recommended for many indexes), here are the correct structures:

Traditional Model

<article-meta>
  <article-id pub-id-type="doi">10.1234/example.2024.001</article-id>
  <volume>48</volume>
  <issue>3</issue>
  <fpage>245</fpage>
  <lpage>260</lpage>
  <pub-date date-type="pub" publication-format="print">
    <day>15</day>
    <month>06</month>
    <year>2024</year>
  </pub-date>
</article-meta>

Volume + Elocation-ID

<article-meta>
  <article-id pub-id-type="doi">10.1234/example.2024.e12345</article-id>
  <volume>2024</volume>
  <elocation-id>e12345</elocation-id>
  <pub-date date-type="pub" publication-format="electronic">
    <day>20</day>
    <month>01</month>
    <year>2024</year>
  </pub-date>
</article-meta>

Continuous Publishing

<article-meta>
  <article-id pub-id-type="doi">10.1234/example.2024.01.15.123456</article-id>
  <volume>2024</volume>
  <elocation-id>2024.01.15.123456</elocation-id>
  <pub-date date-type="pub" publication-format="electronic">
    <day>15</day>
    <month>01</month>
    <year>2024</year>
  </pub-date>
  <pub-date date-type="collection">
    <year>2024</year>
  </pub-date>
</article-meta>

Issue Only

<article-meta>
  <article-id pub-id-type="doi">10.1234/example.45.001</article-id>
  <issue>45</issue>
  <fpage>1</fpage>
  <lpage>15</lpage>
  <pub-date date-type="pub" publication-format="print">
    <month>03</month>
    <year>2024</year>
  </pub-date>
</article-meta>

Pro Tip: Need to convert your PDFs to JATS XML? Tools like FullTextCreator.com can help automate the conversion process while maintaining proper metadata structure for all publishing models.


Common Mistakes to Avoid

Mistake 1: No Page Number AND No Elocation-ID

This will cause PubMed rejection:

<!-- WRONG -->
<volume>48</volume>
<issue>3</issue>
<!-- Where's the page number or elocation-id? -->

Fix: Always include either fpage or elocation-id.

Mistake 2: Using Both Page Numbers and Elocation-ID Inconsistently

<!-- CONFUSING -->
<fpage>1</fpage>
<lpage>15</lpage>
<elocation-id>e12345</elocation-id>
<!-- Which one is authoritative? -->

Fix: Pick one system and stick with it. If using elocation-id, don’t add page numbers.

Mistake 3: Volume Without Year Context

<!-- AMBIGUOUS -->
<issue>3</issue>
<fpage>245</fpage>
<!-- Issue 3 of which year? -->

Fix: Always include volume or year information.

Mistake 4: Inconsistent Metadata Across Articles

Some articles have volume and issue, others have only volume, others have neither—this inconsistency can harm your indexing applications.

Fix: Use the same metadata structure for every article.

Mistake 5: Changing Models Mid-Volume

Starting the year with page numbers and switching to elocation-id mid-year creates confusion.

Fix: If switching models, do it at the start of a new volume/year.


Conclusion

Choosing the right article numbering system isn’t just a technical decision—it affects your journal’s discoverability, citation accuracy, and indexing success.

Key Takeaways

  1. For new journals: Consider starting with elocation-id and volume-only. It provides flexibility for the future.
  2. For established journals: You can keep your traditional model, but consider adding online-first publication.
  3. For high-volume journals: Seriously evaluate continuous publishing.
  4. For all journals:
    • Always use DOIs
    • Produce JATS XML output
    • Maintain metadata consistency
    • Collect author ORCIDs

The Golden Rule

Whatever model you choose, consistency is key. Pick a model, inform all indexes, and apply the same standard to every article.


Need Help?

Setting up or reconfiguring your OJS journal? Have questions about metadata, indexing, or publishing models?

Contact us at ojs-services.com:

  • OJS Installation and Hosting
  • OJS Upgrades and Migration
  • Custom Theme Development
  • 24/7 Technical Support

📞 WhatsApp: +90 543 221 11 28 📧 Email: info@ojs-services.com


This guide provides general information about academic publishing standards. For specific index requirements, please consult the official documentation of each indexing service.

Useful Links:


2026 ojs-services.com – Helping academic journals succeed since 2015

The post Volume, Issue, Page Numbers, and Elocation-ID in Academic Journals first appeared on OPEN JOURNAL SYSTEM SERVICES.

Creating Academic PDFs: Best Practices for Publishers and Editors

January 10th 2026 at 12:54 am

The Complete Guide to Creating Machine-Readable Academic PDFs: Best Practices for Publishers and Editors

A comprehensive guide developed from real-world experience processing thousands of academic articles


Introduction

Over the past months, our team has been developing FullTextCreator, a specialized software solution that converts academic article PDFs into HTML and JATS XML formats for digital publishing and indexing. During this journey—processing hundreds of articles from various journals, disciplines, and countries—we’ve encountered a recurring challenge: inconsistent and incomplete metadata in PDF files.

PDF remains at the heart of academic publishing—and for good reason. Its ability to encapsulate an entire article in a single, self-contained file with embedded tables, figures, and formatting makes it unmatched for portability, sharing, and archival purposes. However, the publishing landscape is evolving. Increasingly, journals are complementing their PDF offerings with HTML, XML, JATS XML, and EPUB formats to enhance accessibility, enable seamless indexing, facilitate data exchange, and comply with emerging standards. These initiatives demonstrably improve a journal’s visibility and discoverability, streamline the indexing process, and meet the growing demands of major databases—many of which now require or strongly prefer structured formats alongside traditional PDFs.

Through our work with JATS XML generation, HTML conversion, and integration with indexing systems, we’ve identified critical patterns that determine whether an article can be processed smoothly or requires extensive manual intervention. The feedback from our users and the edge cases we’ve encountered have revealed that many publishers and content creators are unaware of the specific requirements that enable automated processing.

This guide represents our collective learning—a resource we feel compelled to share with the academic publishing community. Our goal is to help publishers, editors, typesetters, and content creators produce PDF files that are not just visually appealing, but also machine-readable, interoperable, and future-proof.

Whether you’re a journal editor, a typesetting professional, or an author preparing your manuscript, following these guidelines will ensure your content integrates seamlessly with the global academic infrastructure.


Why Does This Matter?

The Digital Academic Ecosystem

Academic publishing has evolved far beyond print journals. Today, your article’s discoverability, citation potential, and long-term preservation depend on its integration with numerous digital systems:

Discovery & Indexing:

  • PubMed/PMC – The world’s largest biomedical literature database
  • Scopus – Elsevier’s comprehensive abstract and citation database
  • Web of Science – Clarivate’s premier citation index
  • Google Scholar – The most widely used academic search engine
  • DOAJ – Directory of Open Access Journals
  • TR Dizin – Turkish national academic index
  • EBSCO – Major academic database aggregator

Identifier & Registration Systems:

  • CrossRef – DOI registration and metadata repository
  • ORCID – Researcher identification system
  • ROR – Research Organization Registry
  • Fundref – Funding acknowledgment registry

Preservation & Archiving:

  • LOCKSS – Lots of Copies Keep Stuff Safe
  • CLOCKSS – Controlled LOCKSS
  • Portico – Digital preservation service
  • Internet Archive – Long-term web archiving

Open Access & Compliance:

  • OpenAIRE – European open science infrastructure
  • CORE – World’s largest aggregator of open access research
  • Unpaywall – Open access availability detection
  • Plan S compliance – Funder mandate requirements

The Cost of Poor Metadata

When PDF metadata is incomplete or inconsistent:

  1. Delayed Indexing: Articles may take months to appear in databases, or never appear at all
  2. Lost Citations: Incorrectly formatted references can’t be matched and counted
  3. Author Misattribution: Authors lose credit for their work
  4. Funding Non-Compliance: Grant requirements may not be met
  5. Preservation Gaps: Articles may not qualify for long-term archiving
  6. Reduced Discoverability: Potential readers can’t find your content
  7. Manual Processing Costs: Staff time spent fixing avoidable errors

Essential Metadata Requirements

1. Digital Object Identifier (DOI)

The DOI is your article’s permanent digital address. It must be:

Correct Format:

DOI: 10.12345/journalname.2024.001

Common Mistakes to Avoid:

  • Missing colon after “DOI”
  • Using equals sign (DOI=10.xxx)
  • Broken or unresolvable DOI links
  • DOI placed only in footer (hard to extract)

Best Practice: Display the DOI prominently on the first page, preferably in the header area with the full https://doi.org/ URL.


2. Author Information

Complete author metadata enables proper attribution and networking.

Required Elements:

Ahmet Yılmaz¹*, Mehmet Kaya², Ayşe Demir¹

¹ Istanbul University, Faculty of Medicine, Istanbul, Turkey
² Ankara University, Faculty of Science, Ankara, Turkey

* Corresponding Author: ahmet.yilmaz@istanbul.edu.tr

ORCID:
Ahmet Yılmaz: https://orcid.org/0000-0001-2345-6789
Mehmet Kaya: https://orcid.org/0000-0002-3456-7890
Ayşe Demir: https://orcid.org/0000-0003-4567-8901
OR
Ahmet Yılmaz: 0000-0001-2345-6789
Mehmet Kaya: 0000-0002-3456-7890
Ayşe Demir: 0000-0003-4567-8901

Critical Points:

  • Author order must be clear and unambiguous
  • Affiliations linked via superscript numbers
  • Corresponding author marked with asterisk (*)
  • Email address for corresponding author
  • ORCID iDs for all authors (16-digit format: 0000-0000-0000-0000)

Why ORCID Matters: ORCID disambiguation prevents author confusion (e.g., distinguishing between “J. Smith” researchers), ensures proper citation counting, and is increasingly required by funders and publishers.


3. Dates (Article Timeline)

Publication dates enable citation tracking and establish priority.

Required Dates:

Received: January 15, 2024
Revised: February 20, 2024 (if applicable)
Accepted: March 10, 2024
Published Online: April 1, 2024

Acceptable Formats:

  • January 15, 2024 (Month DD, YYYY)
  • 15 January 2024 (DD Month YYYY)
  • 2024-01-15 (ISO format: YYYY-MM-DD)
  • 15.01.2024 (DD.MM.YYYY – common in Europe)

Key Terms Recognized:

English Variations
Received Submitted, Date received
Accepted Date accepted, Approval date
Published Published online, Online first, Publication date
Revised Revision, Revised version

Important: Be consistent—use the same date format throughout the document.


4. Journal Information

Journal metadata connects your article to its publication venue.

Required Elements:

Journal of Health Sciences 2024; 15(3): 123-135
ISSN: 1234-5678 (Print) | e-ISSN: 8765-4321 (Online)
Publisher: Academic Publishing House

Components:

  • Journal title (full name, not abbreviation only)
  • Volume number
  • Issue number
  • Page range (first page – last page) OR e-location ID
  • ISSN (print and/or electronic)
  • Publisher name

ISSN Format: Always use the format XXXX-XXXX (four digits, hyphen, four digits/X).


5. Abstract and Keywords

Abstracts are crucial for indexing and discoverability.

Structure:

ABSTRACT

[Abstract text - typically 150-300 words]

Keywords: keyword1, keyword2, keyword3, keyword4, keyword5

Best Practices:

  • Use “ABSTRACT” or “Abstract” as a clear heading
  • For multilingual journals: provide abstracts in all relevant languages
  • Keywords should be separated by commas or semicolons
  • Include 3-7 keywords
  • Use terms from controlled vocabularies when possible (MeSH for medical articles)

Multilingual Considerations: If your article is in a language other than English, include both:

  • Abstract in the article’s language
  • English abstract (required by most international indexes)

6. Article Type Classification

Clearly indicate what type of article this is:

Common Types:

Type Description
Research Article Original research with methodology and results
Review Article Systematic or narrative review of literature
Case Report Clinical or scientific case description
Editorial Opinion piece by editors
Letter to Editor Correspondence or brief communication
Short Communication Brief research report
Meta-Analysis Statistical analysis of multiple studies

Display: Include article type prominently, typically above the title.


7. License and Copyright

Open access compliance requires clear licensing.

Recommended Format:

© 2024 The Author(s). This is an open access article under the 
CC BY 4.0 license (https://creativecommons.org/licenses/by/4.0/)

Common Licenses:

  • CC BY 4.0 – Attribution (most permissive)
  • CC BY-NC 4.0 – Attribution-NonCommercial
  • CC BY-SA 4.0 – Attribution-ShareAlike
  • CC BY-NC-ND 4.0 – Attribution-NonCommercial-NoDerivatives

Important: Include the full URL to the license. This enables automated license detection.


Recommended PDF First Page Layout

Here’s an ideal structure for your article’s first page:

┌─────────────────────────────────────────────────────────────────┐
│  [JOURNAL LOGO]                                                 │
│                                                                 │
│  Journal of Example Sciences                                    │
│  2024; Volume 15, Issue 3, Pages 123-135                        │
│  ISSN: 1234-5678 | e-ISSN: 8765-4321                            │
│  DOI: https://doi.org/10.12345/jes.2024.001                     │
│                                                                 │
│  ─────────────────────────────────────────────────────────      │
│                                                                 │
│  RESEARCH ARTICLE                                               │
│                                                                 │
│  Title of the Article Goes Here: A Comprehensive Study          │
│                                                                 │
│  First Author¹*, Second Author², Third Author¹                  │
│                                                                 │
│  ¹ Department of Science, University of Example, City, Country  │
│  ² Institute of Research, Another University, City, Country     │
│                                                                 │
│  * Corresponding Author: first.author@university.edu            │
│                                                                 │
│  ORCID: F. Author: 0000-0001-2345-6789                          │
│         S. Author: 0000-0002-3456-7890                          │
│         T. Author: 0000-0003-4567-8901                          │
│                                                                 │
│  Received: January 15, 2024 | Accepted: March 10, 2024          │
│  Published Online: April 1, 2024                                │
│                                                                 │
│  ─────────────────────────────────────────────────────────      │
│                                                                 │
│  ABSTRACT                                                       │
│                                                                 │
│  [Abstract text...]                                             │
│                                                                 │
│  Keywords: keyword1, keyword2, keyword3, keyword4               │
│                                                                 │
│  ─────────────────────────────────────────────────────────      │
│                                                                 │
│  © 2024 The Author(s). CC BY 4.0                                │
│  https://creativecommons.org/licenses/by/4.0/                   │
│                                                                 │
└─────────────────────────────────────────────────────────────────┘

Article Content and Structural Layout

Not only the first page but also the structure of the body text is of critical importance for machine readability and conversion processes. Paying attention to the following rules when organizing your content will ensure that our software and other indexing systems process your article correctly.

1. Heading Hierarchy and Format

Headings and subheadings within the article must clearly demonstrate the text’s hierarchical structure.

  • Visual Distinction: Main headings (H1), subheadings (H2), and lower-level headings (H3) must differ from one another in size, weight (boldness), or style. For example; main headings could be 14 pt and bold, subheadings 12 pt and bold, and a lower level 12 pt and italic.

  • Consistency: Apply your chosen format consistently throughout the entire article. This ensures software correctly detects heading levels.

2. Image, Table, and Figure Captions

Visual elements and tables are separated from the text flow during machine processing. Therefore, it is absolutely mandatory for each to have a caption indicating what it is.

  • Numbering: Use sequential numbering for each element type (e.g., Table 1, Table 2… or Figure 1, Figure 2…).

  • Descriptive Text: A short and clear title/caption explaining the element must immediately follow the numbering.

  • Position: Table titles should generally be placed above the table, while figure and image captions should generally be placed below the visual, and this rule must be consistent throughout the article.

  • Example:

    • Table 1: Demographic characteristics of patients participating in the study.

    • Figure 3: Schematic representation of the experimental setup.

3. Column Layout

The layout of the article text directly affects the accuracy of the automated extraction process.

  • Single Column Recommendation: In every possible case, we strongly recommend using a single-column layout for the article body. Single-column texts are read much more easily and accurately by machines, the text flow remains intact, and HTML/XML conversions are smoother.

  • Strict Necessity: If using two columns is absolutely necessary due to journal design, ensure that the gap between columns is distinct and the text flow (left-to-right, top-to-bottom) is clear. However, remember that multi-column structures increase the risk of conversion errors.

Pre-Publication Checklist

Before finalizing your PDF, verify:

✅ Identification

  • [ ] DOI is present and correctly formatted
  • [ ] DOI link is functional (resolves to the article)
  • [ ] ISSN/e-ISSN is displayed
  • [ ] Journal name is complete (not just abbreviation)

✅ Authors

  • [ ] All author names are listed in correct order
  • [ ] Each author has affiliation number(s)
  • [ ] All affiliations are listed with corresponding numbers
  • [ ] Corresponding author is marked (*)
  • [ ] Corresponding author email is provided
  • [ ] ORCID iDs are included for all authors

✅ Dates

  • [ ] Received date is present
  • [ ] Accepted date is present
  • [ ] Published/Online date is present
  • [ ] Date format is consistent throughout
  • [ ] Dates are logical (received < accepted < published)

✅ Content Metadata

  • [ ] Article type is clearly indicated
  • [ ] Abstract is present with clear heading
  • [ ] Keywords are listed (comma or semicolon separated)
  • [ ] Volume, issue, and page numbers are included

✅ Structural and Visual Layout

  • [ ] Headings and subheadings are in different formats (size, bold, etc.) to show hierarchy

  • [ ] All images, tables, and figures have numbered and descriptive captions

  • [ ] Article body is prepared in a single-column layout if possible

✅ Rights & Access

  • [ ] Copyright statement is included
  • [ ] License type is specified
  • [ ] License URL is provided

✅ Multilingual (if applicable)

  • [ ] Abstract in article language
  • [ ] Abstract in English
  • [ ] Keywords in both languages
  • [ ] All dates use consistent terminology

Common Mistakes and How to Fix Them

Problem Impact Solution
DOI in footer only Extraction failure Move to header/first page body
Unclear author order Attribution errors Use numbered sequence
Missing ORCID Author disambiguation fails Add for all authors
Date format mixing Parsing errors Use one format consistently
No license URL Open access detection fails Include full CC URL
ISSN typo Journal matching fails Double-check format
Abstract without heading Content extraction fails Add clear “ABSTRACT” heading

Conclusion

Creating well-structured PDFs is an investment in your journal’s digital future. The metadata you include today determines how discoverable, citable, and preservable your content will be for decades to come.

At FullTextCreator, we’ve built our system to handle variations in formatting—but the cleaner your source files, the more accurate and faster the conversion process. By following these guidelines, you’re not just making our job easier; you’re ensuring your authors’ work reaches its full potential audience.

Questions or need help? Visit fulltextcreator.com or contact us at support@fulltextcreator.com.


This guide is provided by the FullTextCreator team as a service to the academic publishing community. We welcome feedback and suggestions for improvement.

Last Updated: January 2025

The post Creating Academic PDFs: Best Practices for Publishers and Editors first appeared on OPEN JOURNAL SYSTEM SERVICES.

❌
❌